- Help Center
- Product catalog
- Import data
- How to build an import file?
How to build an import file?
Anne-Sophie F
-Updated on Friday, August 18, 2023
Creating a solid import file is essential for the smooth running of your store. Let's find out how!
To access: Advanced settings > Import
What is an import file?
PrestaShop allows you to import multiple data files. Customers, categories, products: all this data can be easily imported into PrestaShop thanks to a text file using a CSV ("Comma-Separated Values") data format, and the associated .csv file extension.
How do I create an import file?
However, it's best to use a spreadsheet program and save your work in CSV format. Compared with a text editor, a spreadsheet lets you work faster and more visually.
You can use either the Microsoft Excel payware or the OpenOffice.orgopen source software. More modern and frequently updated, LibreOffice is also an interesting alternative.
Here is an example of a file ready for import, here for a list of products:

We recommend that you use the example files provided by PrestaShop to import your data. Download them in Advanced Settings > Import.
Building your data
The first line of your file is used to designate your columns. Please note that :
- The price column uses your store's default currency.
- Categories are indicated by their existing identifier (so you need to import them first), and are separated by commas.
- The web address of the images must be an absolute link.
- In other words, you need to use the address that the browser needs to call up to display the image. For example, http://www.monprestashop/images/produitXXX.jpg - prefer data encoding UTF-8. Alternatively, use ISO-8859-1 and validate the " ISO-8859-1encoded file" option.
| 💡 We recommend using the semicolon (;) as a field separator. If your textual data (product descriptions, etc.) contains semicolons, remember to remove them. |
How do I import my file?
Once you have all your data in CSV format, you can import the file into your back-office using the form on the Advanced Settings page > Import.
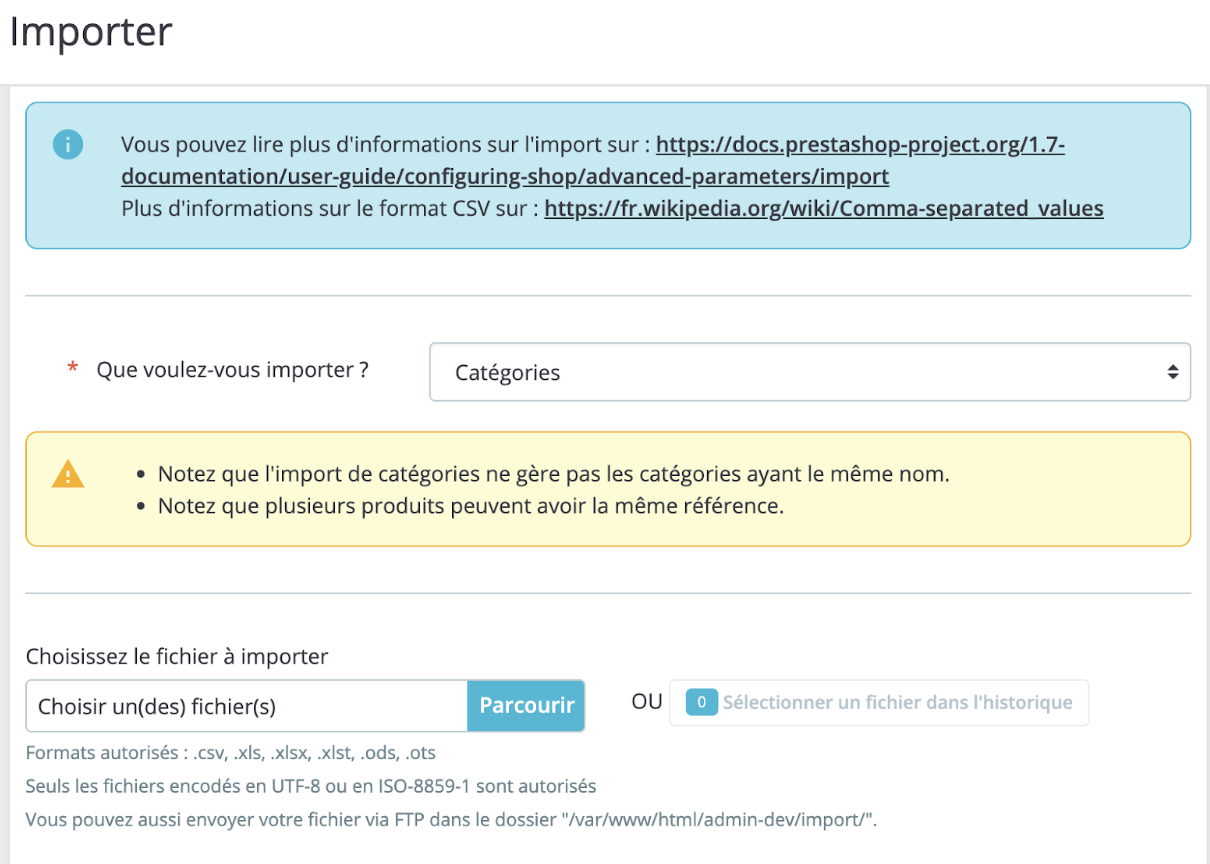
To add files for import, proceed as follows:
- Click on the "Choose file to import" button.
- Select the data type of your file using the drop-down list entitled "What do you want to import?".
- Select the language of the imported content.
- Select field separators. We suggest you leave the default values ("field separator" with a semicolon, "multiple value separator" with a comma).
- Once you've made all your choices, click on "Next step".
Once you've finished matching your columns, click on the "Import" button at the bottom right of the page so that PrestaShop will launch the import. When the process is complete, you'll be redirected to the main page, where you'll be notified that the import has been successfully completed.
When you click on the "Next step" button, the page is reloaded with the data-matching tool. This interface helps you map the data columns in your file to those required by PrestaShop.
|
💡 To test this feature, PrestaShop recommends that you run tests on a local copy of your store. So your store in production won't be affected. |
Share