- Help Center
- Shipping & Logistics
- Manage carriers
- Create a carrier
Create a carrier
Anne-Sophie F
-Updated on Friday, August 18, 2023
PrestaShop allows you to add and configure your carriers to offer your customers a wide range of delivery options. Here's how!
To access: Delivery > Carriers
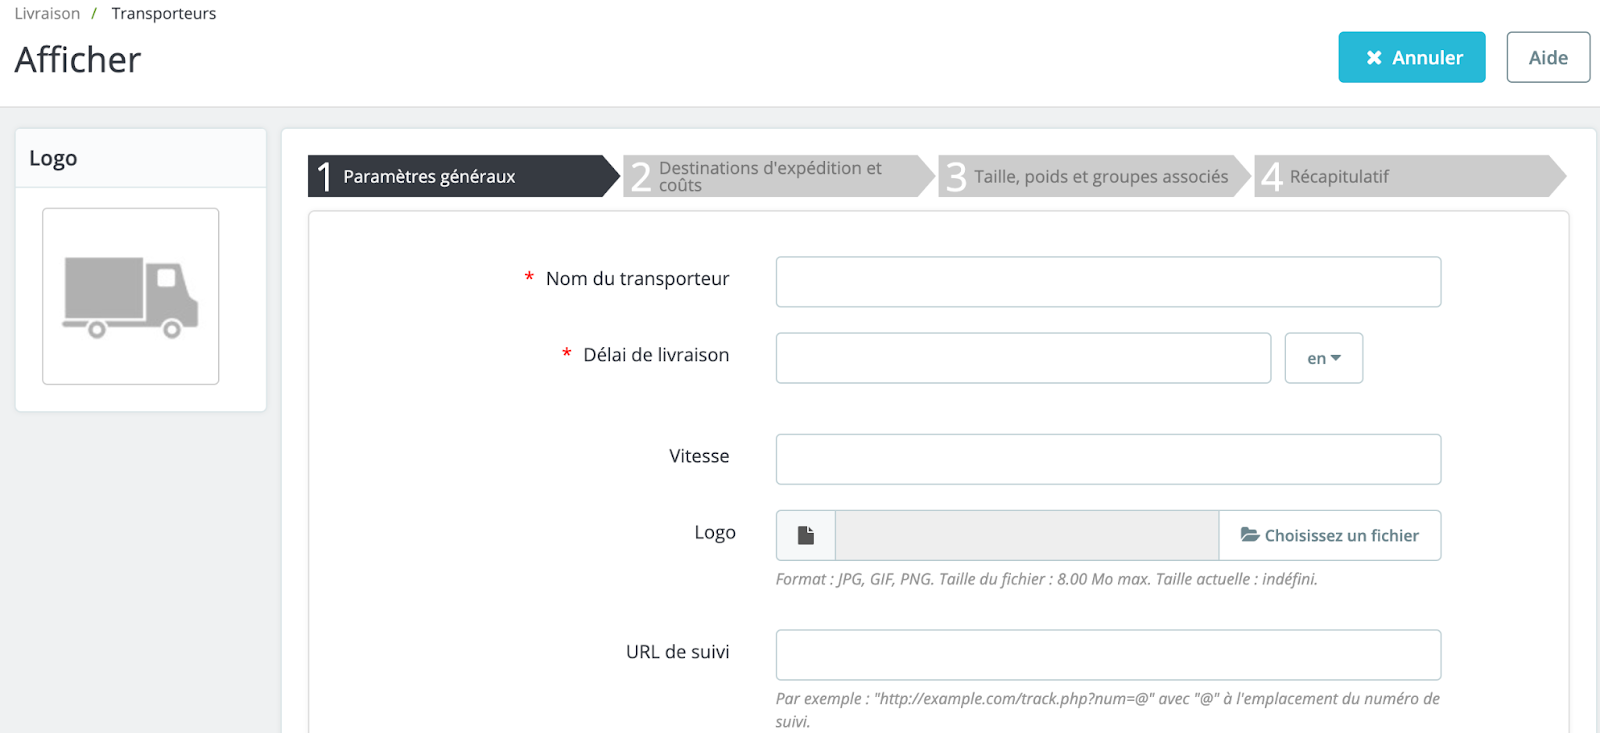
Click on the "Create a carrier" button at the top right of the page to access the following carrier creation form:

There are four steps to creating a new carrier. We'll guide you through each of them.
Adding a new carrier: general parameters
The first step requires the following information:
- Carrier name: the official name of your carrier. If you have several carriers PrestaShop for delivery services from the same carrier (if one of your carriers offers a special service for bulky items, for example), you can differentiate them by name.
| 💡 You can add a description of the service to the name. For example, "PrestaLivraison - 500 kg and more" might indicate that this carrier is reserved for products weighing over 500 kilos. |
- Delivery time: Add here the estimated time required for the carrier to deliver your product. This information is displayed during the order process, when the customer selects the delivery option. This is very important, as it enables your customers to make the best choice of carrier based on how long they are prepared to wait for delivery.
| 💡 Customers are often willing to pay more to receive a parcel faster. |
- Speed: the "Speed" setting lets you rate the conveyor, from 0 (very slow) to 9 (very fast). This score is then used to compare carriers according to their speed, and help customers choose the one they prefer. This field is optional.
- Logo: a logo is useful to help customers identify the carrier. It will appear when the customer places an order. This field is optional.
- Tracking URL: if your carrier offers one, this field must be filled in with the tracking address provided by your carrier. For example, the French postal service, La Poste, offers the following address: https://www.laposte.fr/outils/suivre-vos-envois. When the customer chooses his carrier, he will receive the address you entered in this field, and will only have to enter his tracking number on this page to access information about his parcel.
Click on "Next", at the bottom right of the screen, to access the second step.
Add a new carrier: shipping destinations and costs
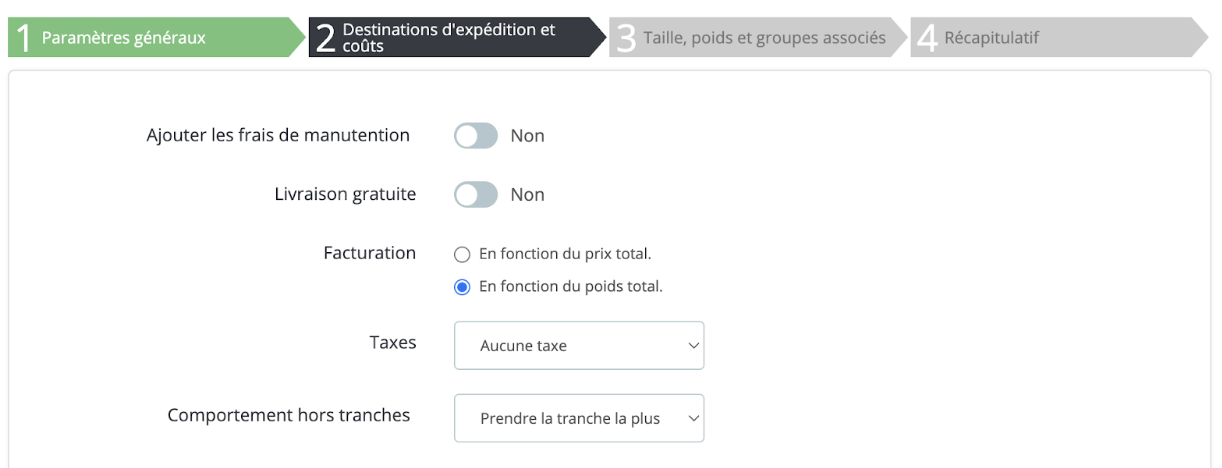
The second parameter-setting step is as follows:

- Add handling charges: add or remove handling charges from the carrier price.
- Free delivery: if this option is activated, you will not be able to specify a delivery price. On the contrary, if this option is deactivated, you will be able to modify the brackets and costs per country in the form below.
- Invoicing: when invoicing the customer for transport, you can choose between two methods: based on total price (invoicing will then depend on the total price of the order) or based on weight (invoicing will then depend on the total weight of the order).
- Tax: insert the tax required by the carrier. To find out more about tax creation, click here.
-
Out-of-band behavior: a band is a range within which a specific price applies (e.g. delivery to €3.99 for products weighing between 1 and 2 kilos). If the chosen carrier does not have shipping costs in place for the required zone or weight, you can specify how PrestaShop should react. You have two options:
- Take the biggest slice: PrestaShop will take the most expensive slice and apply its conditions.
- Disable carrier: PrestaShop will not offer this carrier, as it is unlikely to deliver this order.
How do I configure delivery times?
Setting delivery times is crucial, as PrestaShop needs this information to show customers which carriers are able to deliver their order.
Depending on the total price or weight of the order, some carriers may not be available, while others may only be available for certain values. You must therefore fill in these slices very precisely, preferably following each carrier's documentation.
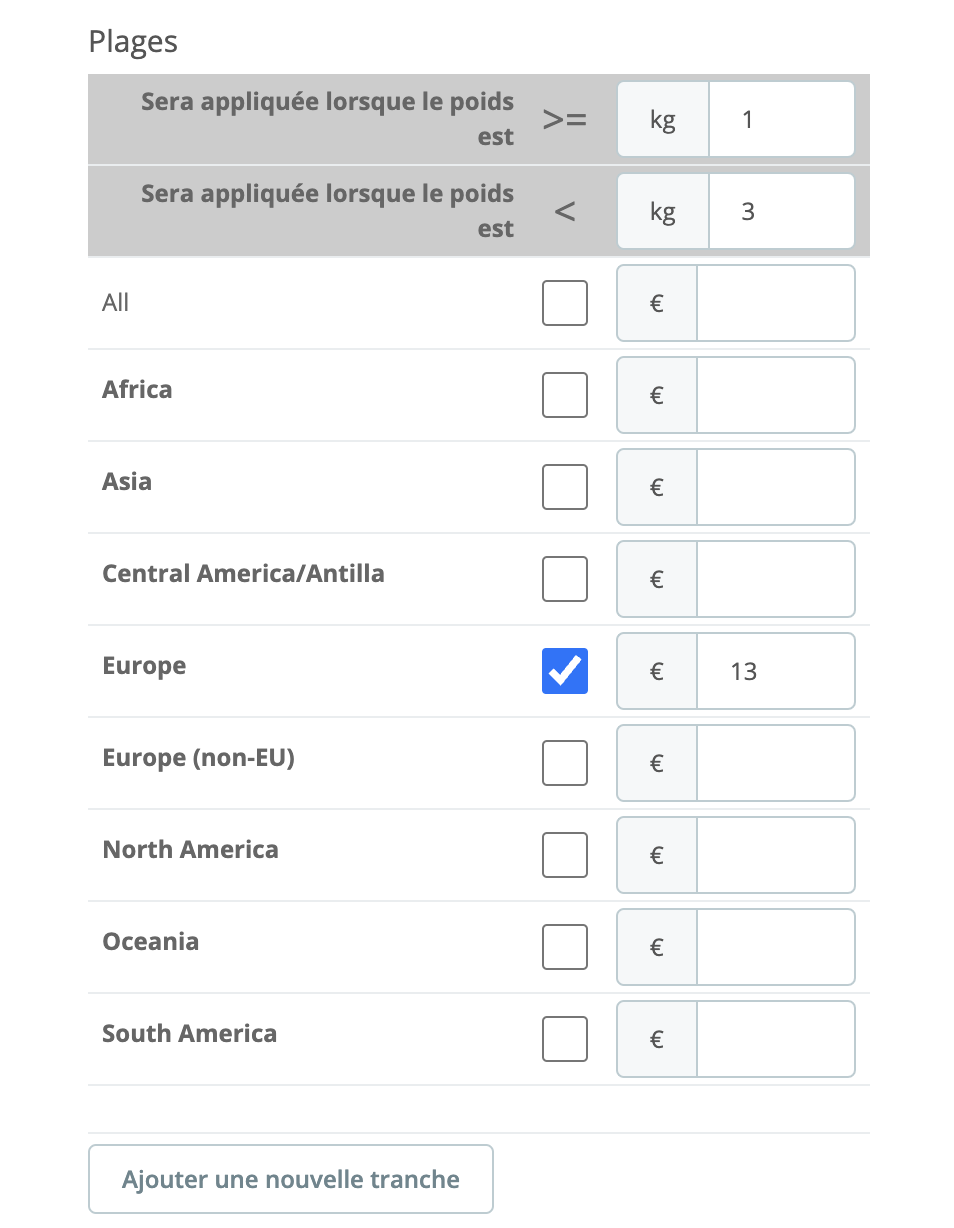
PrestaShop allows you here to build price or weight bands (depending on your selection in the "Band choice" option above), one band at a time, applying your prices for each zone to each band.

How do I create a new slice?
- Specify the upper and lower weight limits of the slice you are creating.
- Indicate your slice area. If the carrier does not deliver to this area, leave the box unchecked.
- Indicate the price of your slice.
- Click on "Add a new slice".
You can create as many slices as you like. Once all the slices have been created, click on "Next" to access the third step in setting up your new carrier.
Add a new carrier: size, weight and associated groups
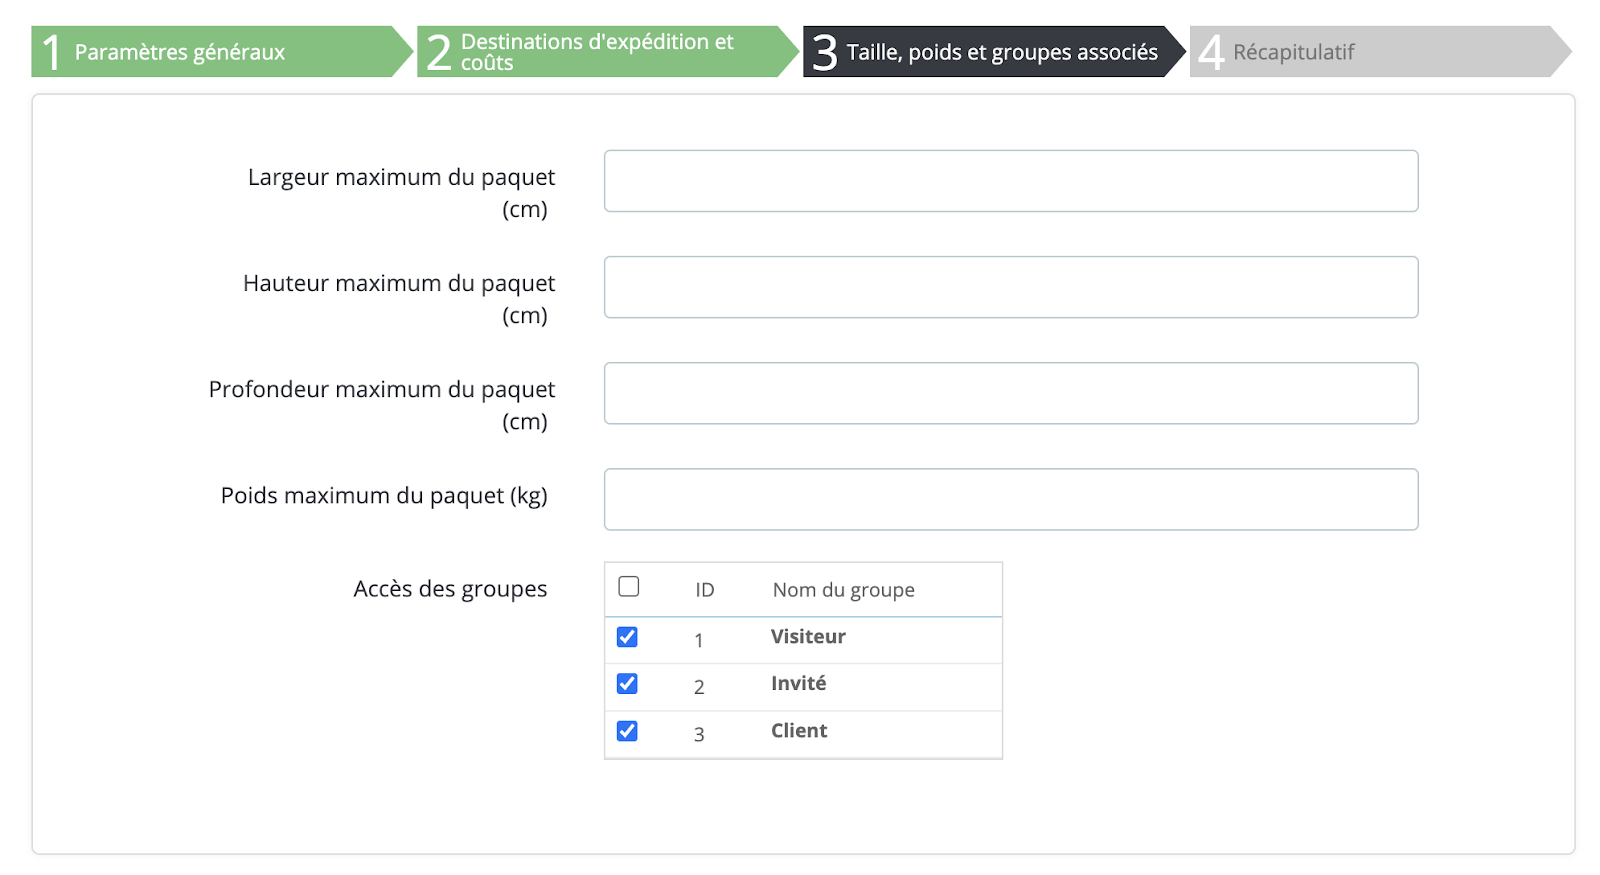
The third step is as follows:

- Maximum height/width/depth/weight of package: these fields allow you to specify the maximum dimensions of packages handled by your carrier. If you don't want to fill in any fields, leave them empty.
- Group access: to restrict access to this carrier to members of a specific group.
Click on "Next" to access the fourth and final step.
Add a new carrier: summary
This last step allows you to preview a summary of the settings configured for this carrier.
| 💡 If you wish to modify certain settings, you can return to previous panels by clicking on the "Back" button. |
You can save this carrier as a draft and return to it later to finalize its configuration. In this case, disable it using the "Enabled" switch at the bottom of the page. Click the "Finish" button to save your settings and create your new carrier.
Share