- Help Center
- Store administration
- Getting help
- Why do we need access to your back office?
Why do we need access to your back office?
Christophe Bernon
-Updated on Friday, August 25, 2023
When you contact our Support department at PrestaShop, we may ask you for access to the back office of your PrestaShop store, as well as FTP/SFTP access to your server.
What is the goal of this request?
We make this request in order to facilitate our investigations and maximize our chances of resolving your problem as quickly as possible.
Your store may be hosted by you, or by an external service provider. This means that we do not have access to your store.
As a result, we cannot begin the investigation process necessary to resolve your problem.
These actions include (but are not limited to):
- Check store parameters and/or module parameters ( PrestaShop version, PHP version, module versions, etc.).
- Determining whether an incompatibility exists
- View error message
- Attempt to reproduce abnormal behavior
- Finding a solution to the problem
We can ask you to carry out all these actions, but this will increase the number of exchanges required, and therefore the time needed for resolution.
That's why we're asking you for access, so we can investigate quickly, efficiently and provide you with a rapid solution.
Note that you can create temporary and restricted back-office accesses.
|
💡 Whenever possible, we recommend creating accesses to a pre-production environment rather than to a store currently in production. We can help you create this kind of environment! |
How can you create secure accesses?
To create accesses for support, or the developer of a module, you must always create an employee account, which you can deactivate at the end of the intervention. Never give out your personal access.
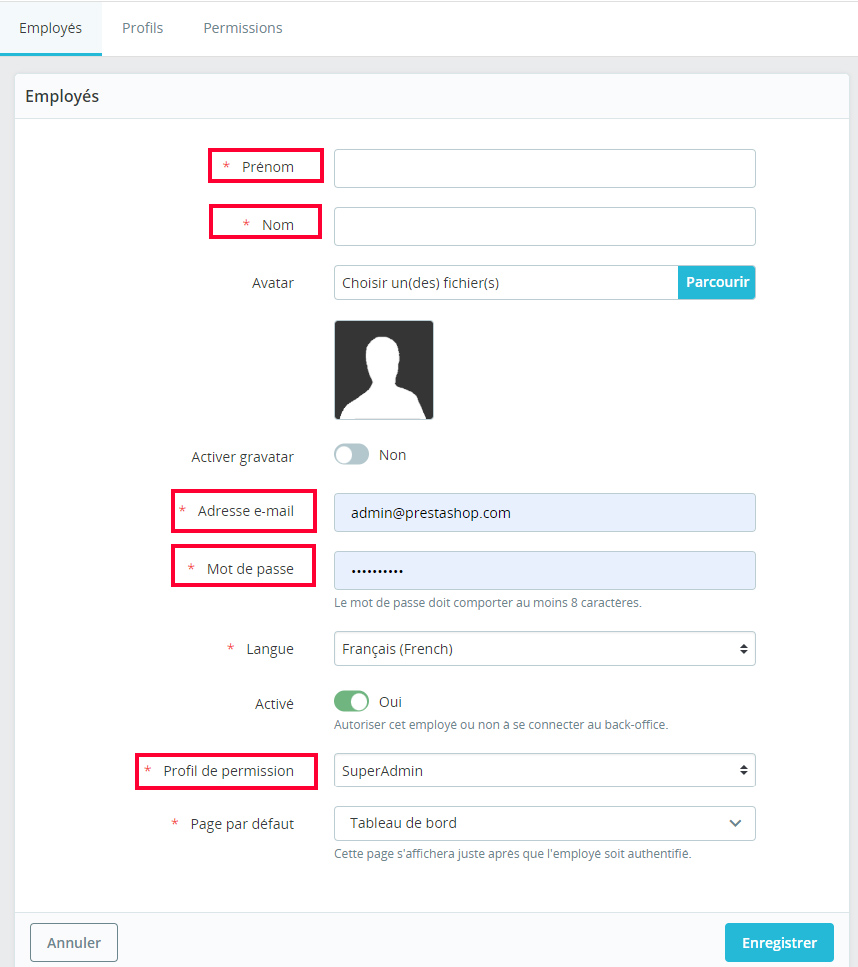
To create an employee account, follow the steps below:
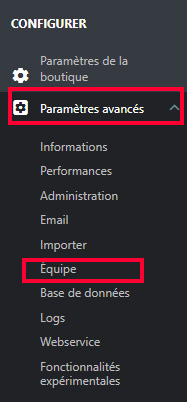
- Click on Advanced settings, then on Team
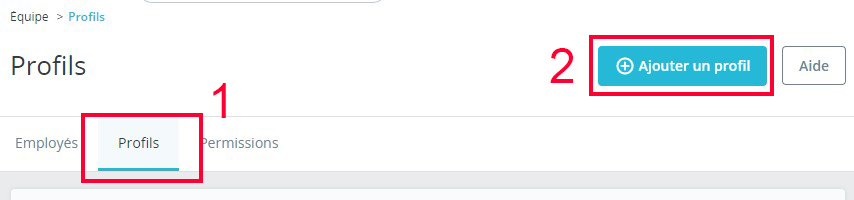
- Create a profile, e.g. Support, by clicking on the Profiles tab, then on the Add a profile button, then save.
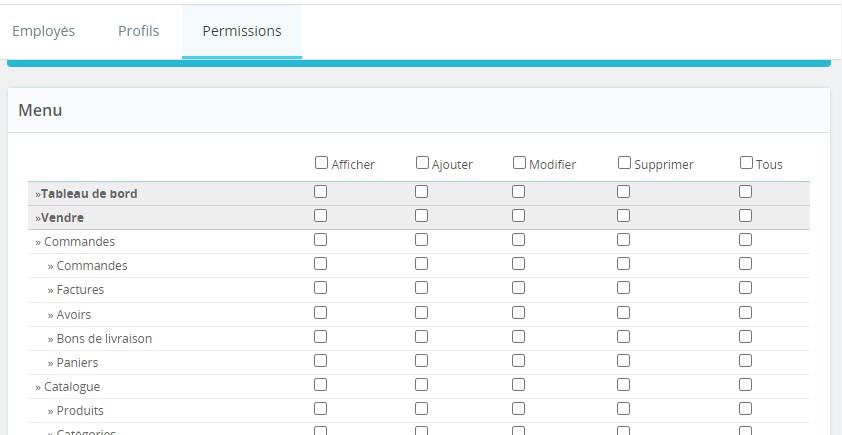
- Next, create the permissions for the profile you've just created (so you can decide to give access to the entire module but not to your customers), simply by ticking the boxes of the options you want to give access to.
- Then click on the Employees tab and on Add an employee
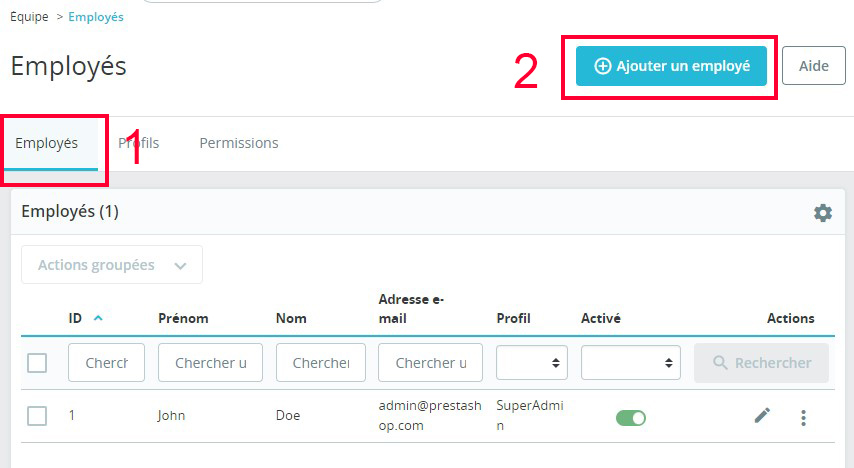
- Set up the new employee account details (Last name / First name / E-mail address / language if applicable / but above all the permission profile you created earlier, e.g. support).
- Once the account has been created, provide your contact with the following information:
- access url to your back office
- the e-mail address defined for the account
- the password created
Share