- Help Center
- Controls
- Manage customer service
- Configure messaging
Configure messaging
Anne-Sophie F
-Updated on Monday, June 26, 2023
To make it easier to communicate with your customers, PrestaShop lets you configure your own messaging system. Find out how!
To access: Shop settings > Contact
The PrestaShop messaging system is very useful for enabling your users to contact the right person directly, depending on their needs: customer service, technical support, sales, etc.
How do I create email contacts?
To ensure that your customers' messages find the right recipients, it's important to configure your store's contacts.
The Shop settings page > Contact shows a list of existing contacts in your store. Click on "Add a contact" to access the contact creation form.
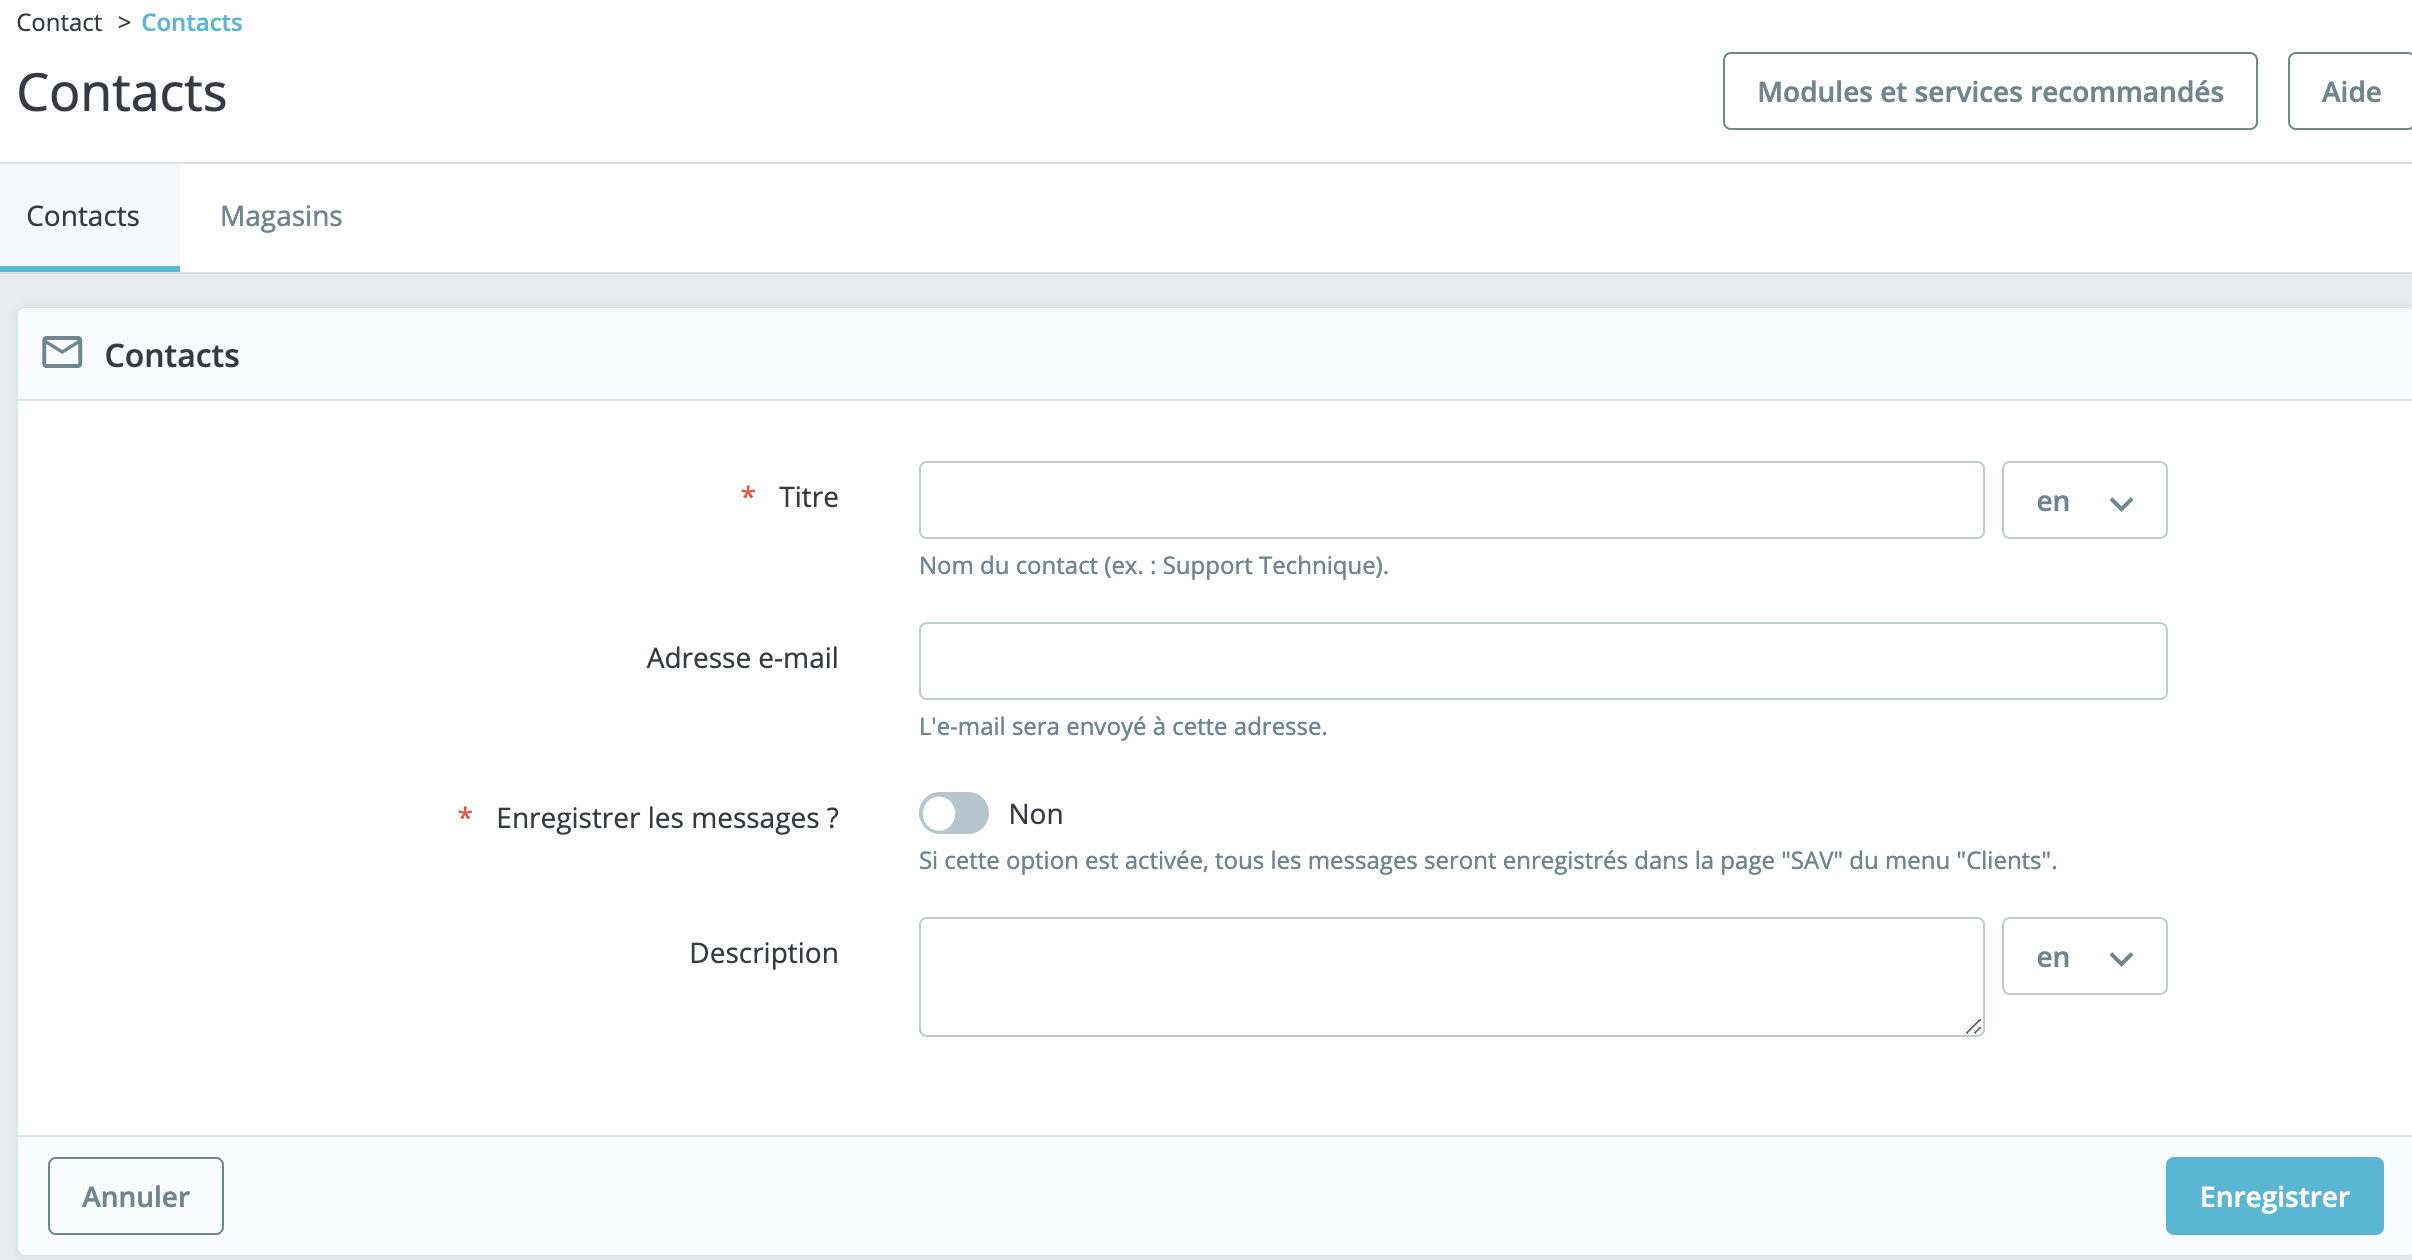
1. Enter the contact title. For example, it could be the name of a person or the name of the service itself.
2. Add his e-mail address. It may be identical to that of another contact.
| 💡 If you don't really have a team, note that all contacts can have the same address - customers won't know. Having different contacts can reassure your customers and give them confidence in your store, as it means that many people work there. |
3. Indicate whether messages should be saved in your store's back-office after-sales management tool or just sent by e-mail.
| 💡 Not saving messages can be useful for a contact like "Partnership proposal", but you might prefer these messages to arrive directly in your mailbox without being read by your whole team. |
4. Enter a short description, no longer than one line, as this will be displayed to the customer on the contact form.
5. Save to put this new contact online.
How do I add a predefined message?
When you send a message to one of your customers, you can save the message so that you can later reuse it and send it on to other customers with similar questions or comments. To do this, click on SAV > Predefined messages.
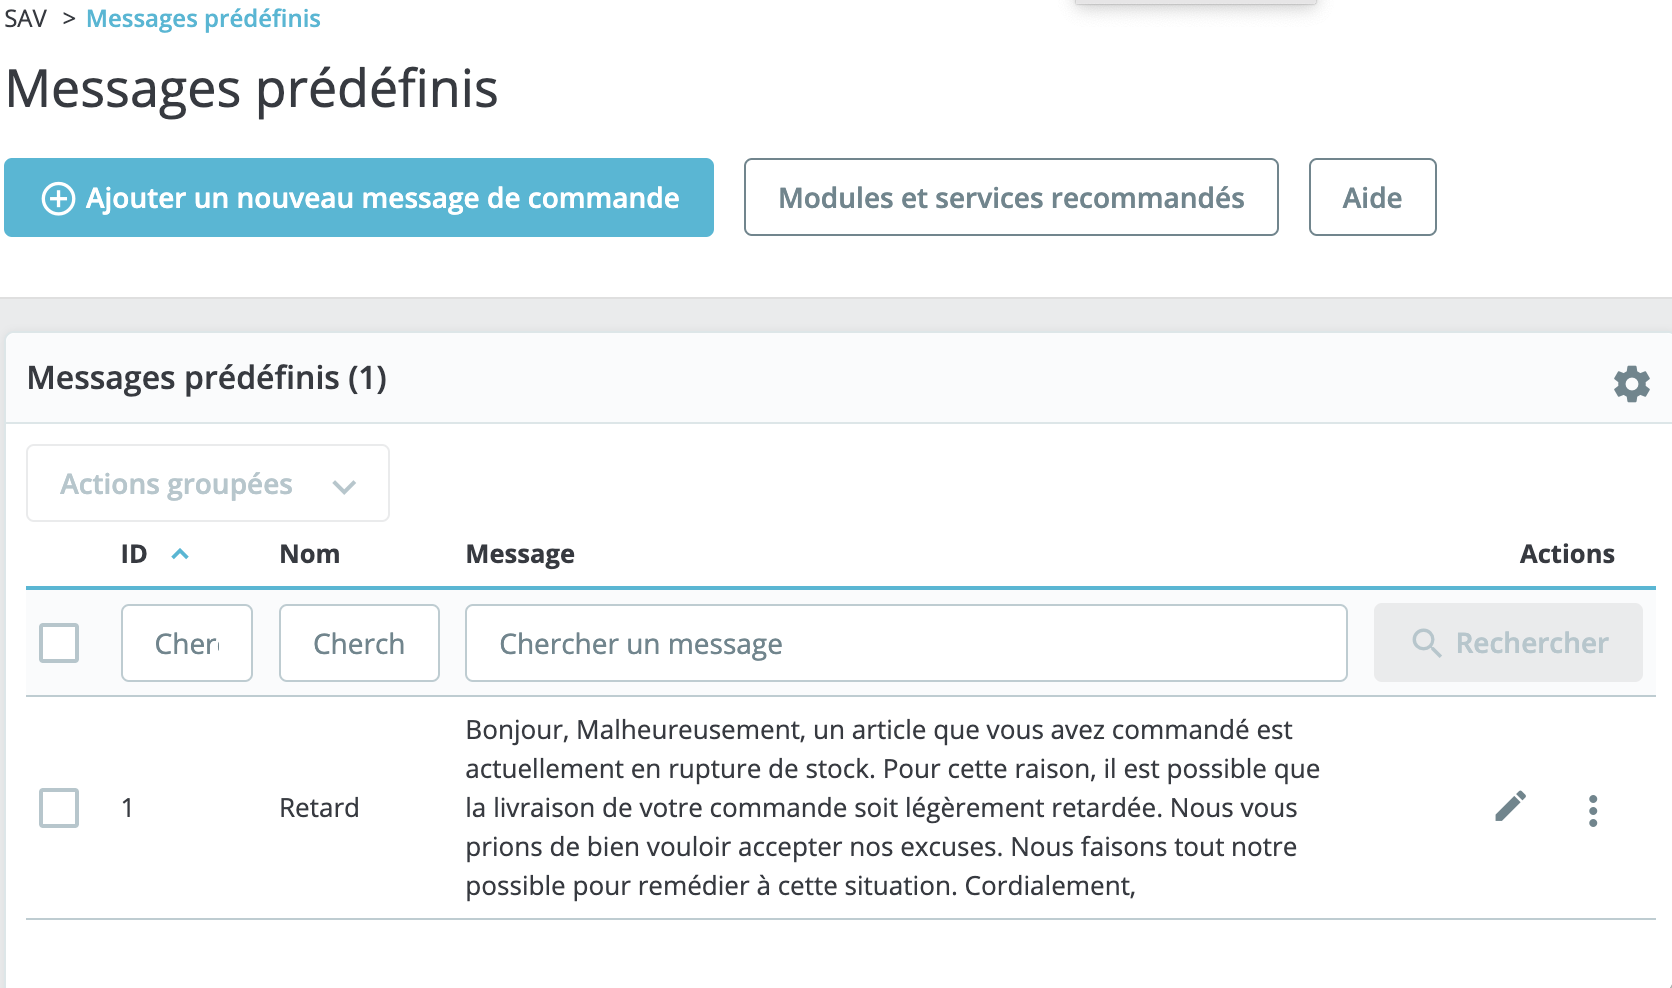
By default, a delay message is already defined.
Use the "Modify" icon, symbolized by a pencil, to personalize this message.
Create new predefined messages
To add other reusable messages, click on the "Add a new order message" button. A creation form opens.
- Name your message so that it's easy to find later.
- Then write the content you want to send to your customers.
- Once these two fields have been completed, click on "Save".
You can create as many messages as you like.
Send a predefined message to a customer
Once you've set up your predefined messages, you can send them directly to a customer's order:
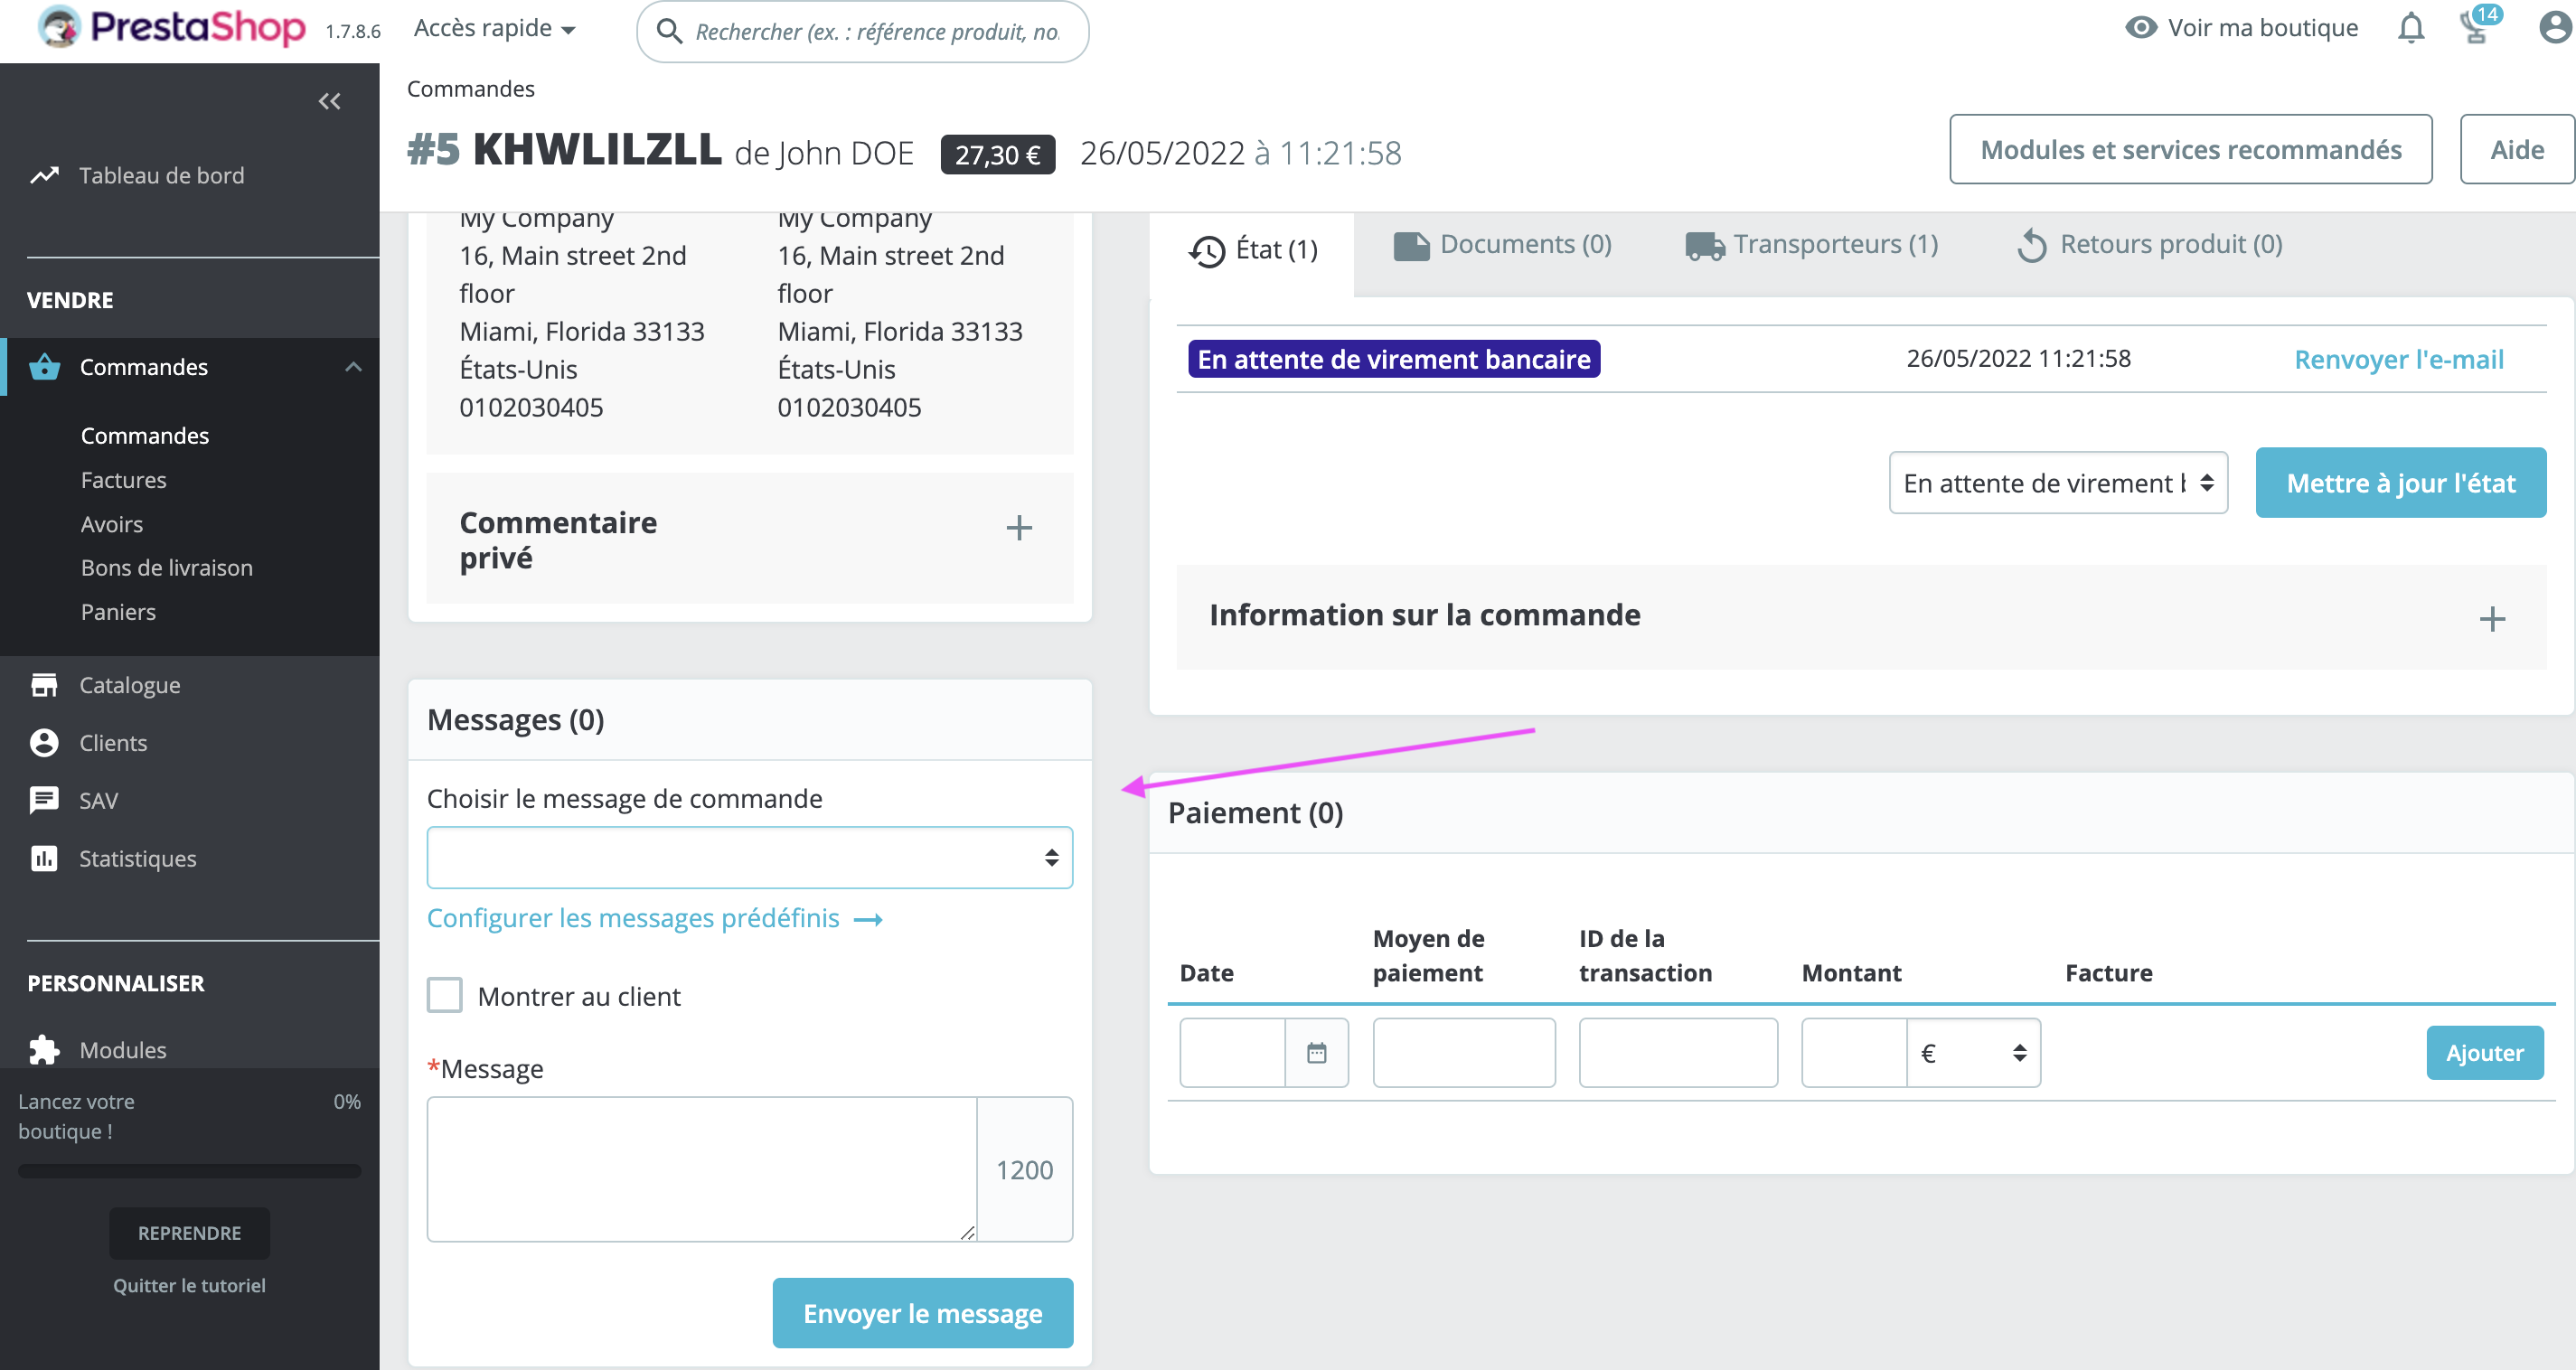
- Select the predefined message you wish to send.
- Modify it if necessary, to adapt it to the order or the customer.
- Activate the "Show to customer" option so that the customer can see the message.
- Click on "Send message".
Your customer will receive the message on the e-mail address associated with their customer account. To continue the conversation, go to the > back-office page.
[metadescription:]Find out how to set up your mailbox in your store PrestaShop.[:meta description]
Share