- Help Center
- Installation
- Setting up a domain name
- Connect a domain name to PrestaShop Hosted
Connect a domain name to PrestaShop Hosted
Julie
-Updated on Friday, November 24, 2023
In this article, you’ll learn how to connect a purchased domain name to your PrestaShop Hosted store.
Ultimately, you’ll learn how to replace the default URL format (mystore.mypresta.com) with a custom domain name, such as mystore.com.
|
💡A custom domain name can help boost your brand image and your store’s reputation. This way, you’ll be more visible on search engines, and your visitors will be more likely to gain your trust. |
Requirements
- You must already own a domain name you previously purchased from a web hosting company. For example Gandi, GoDaddy, IONOS, OVH, etc.
- You must be logged into your account on your host’s website.
- You must also be logged into your PrestaShop Hosted back office.
Main steps
To connect your domain name to your PrestaShop Hosted store, you need to follow 3 steps:
- First, you will need to fill in your new domain name in your PrestaShop Hosted back office.
- Then, PrestaShop will display 3 values you must copy and paste onto your host’s interface in order to set up a connection between your domain and your host.
- Lastly, you will be able to connect your new domain name to your PrestaShop Hosted back office in a single click.
All set? Then, let’s follow the guide!
Connect a domain name
Fill in the domain name
In your PrestaShop Hosted back office:
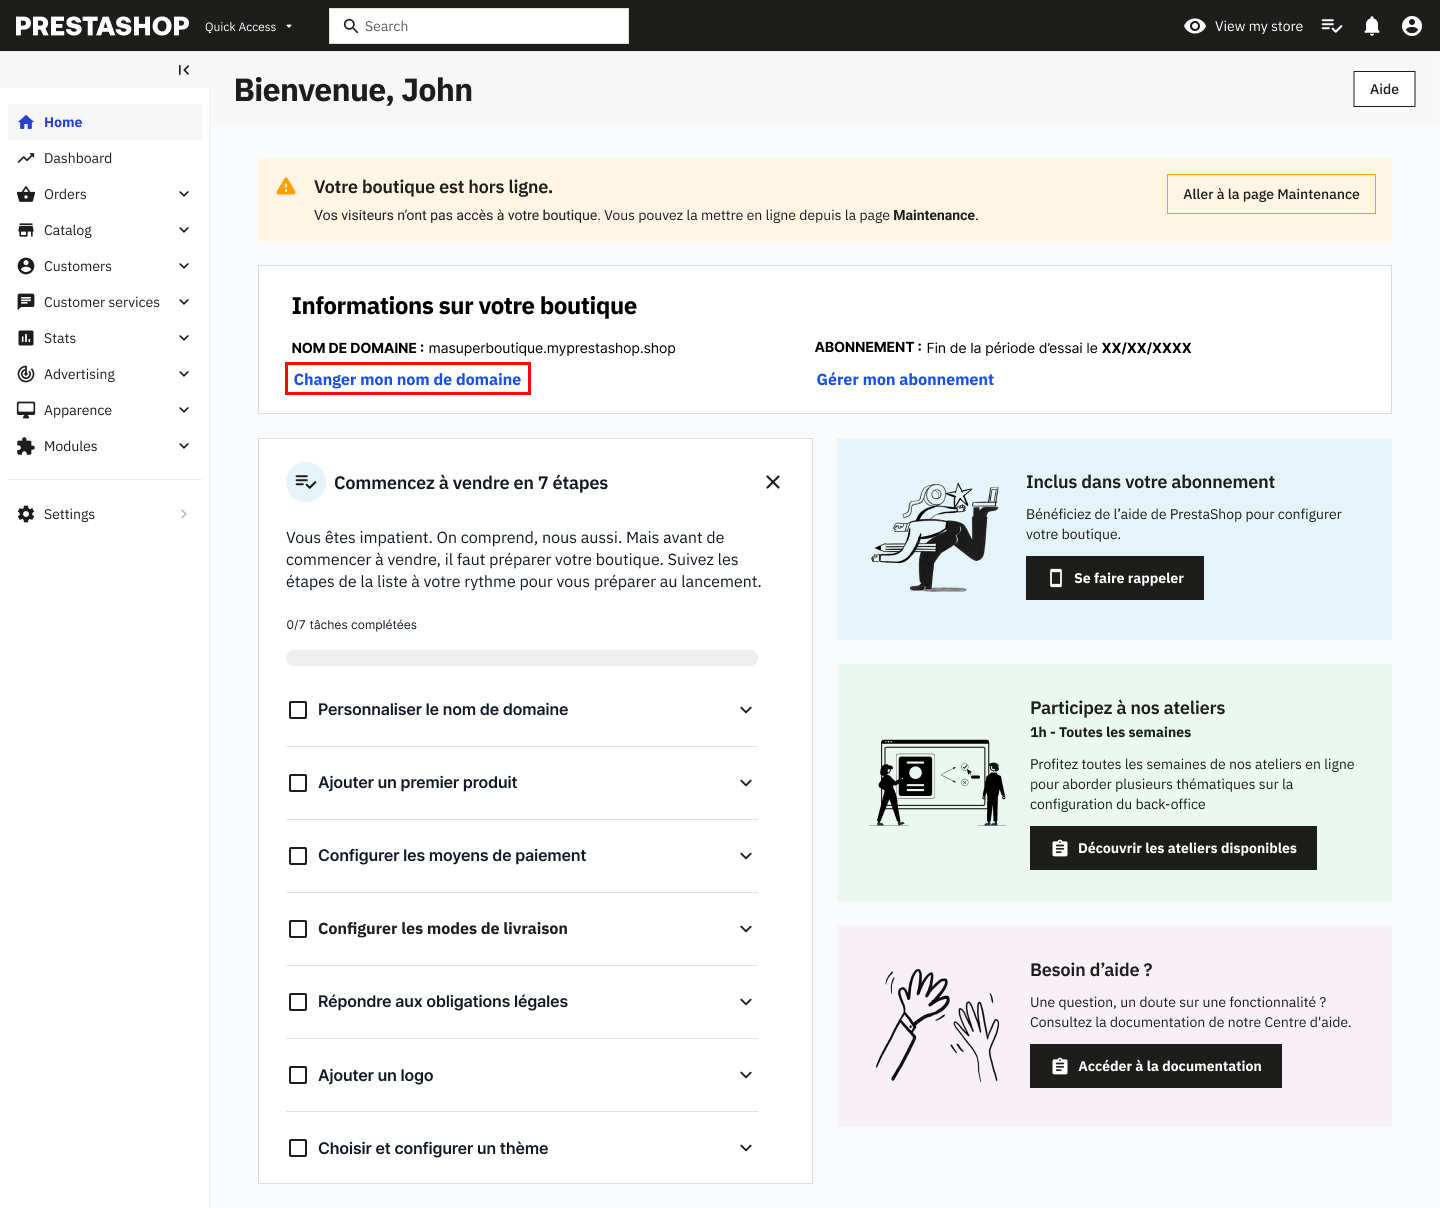
- In your back office’s homepage, click on Change my domain name. You can also access this page from the left-side menu (Shop parameters > Domain name).
- Click on Connect a domain name.

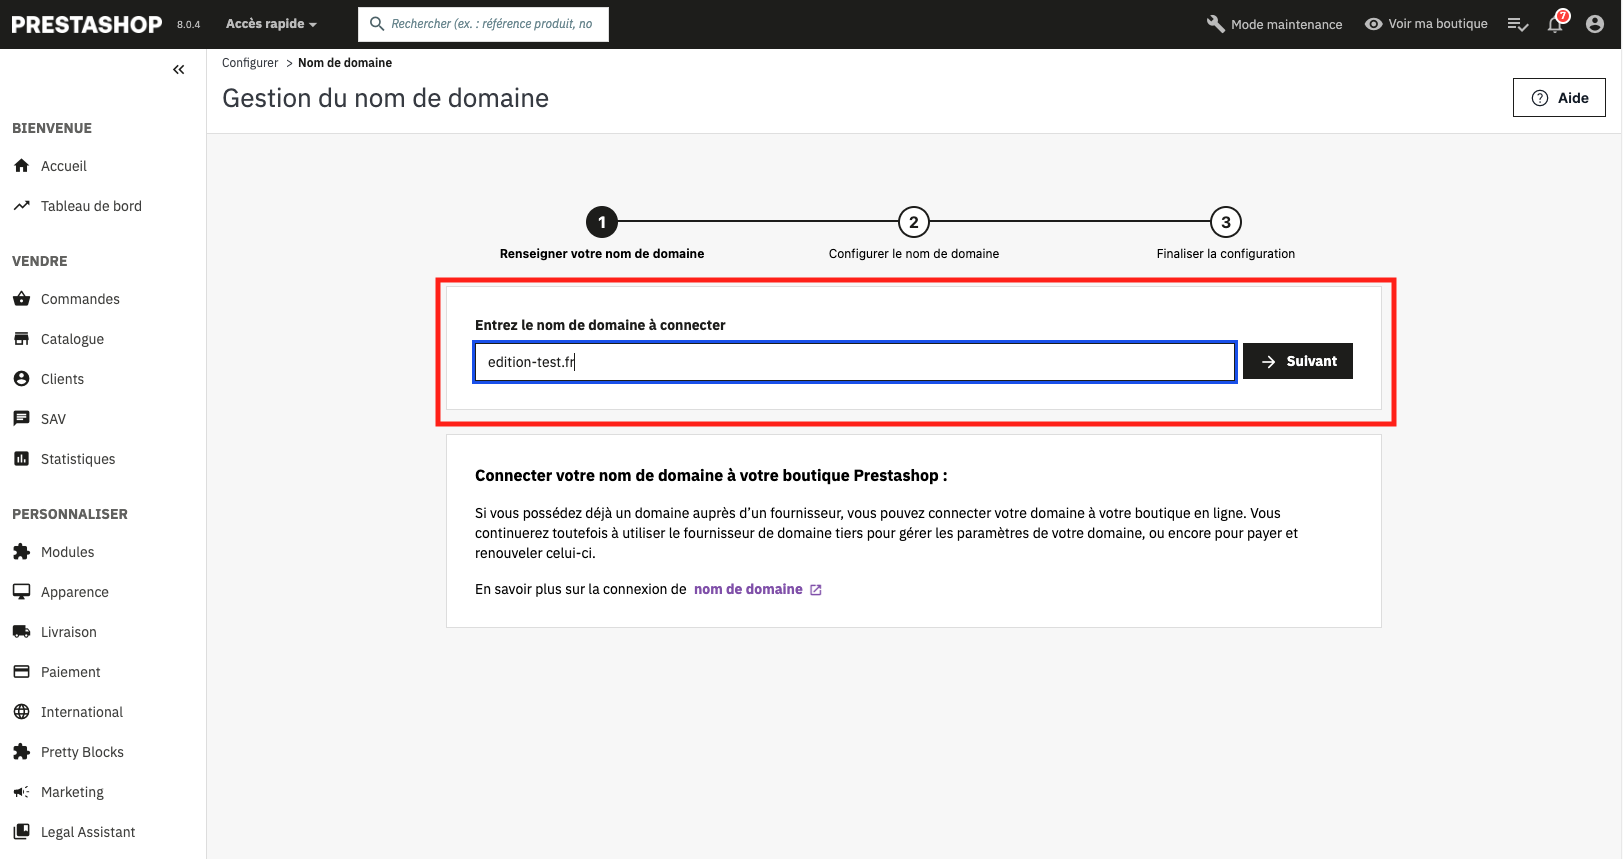
- Fill in your domain name (for example mystore.com), then click Next
Configure the domain name
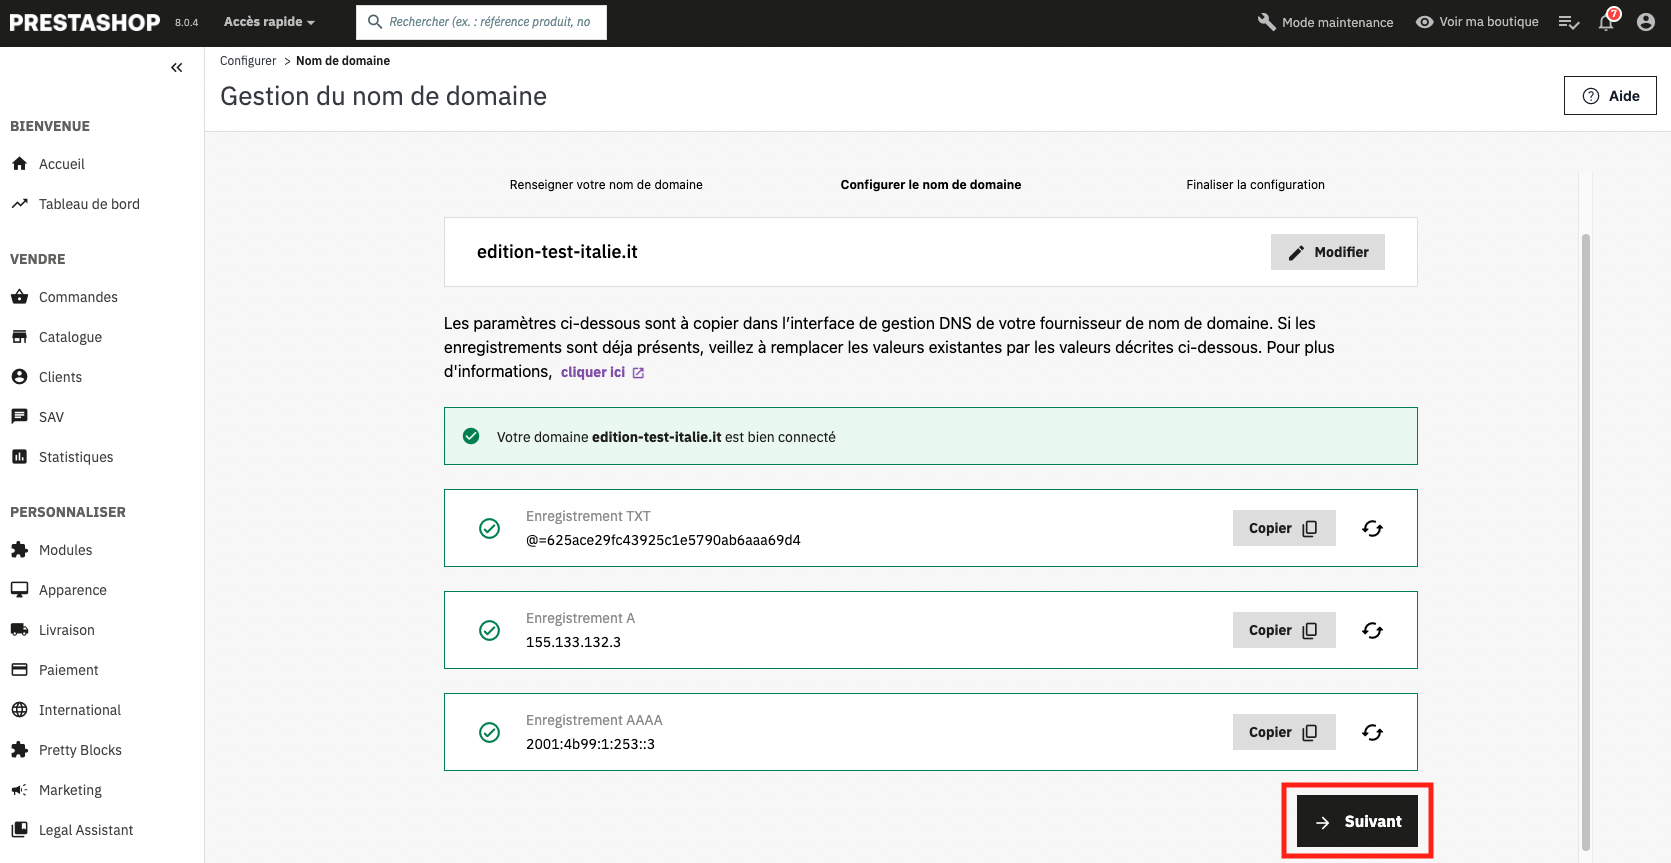
PrestaShop displays 3 types of records:
- The TXT record
- The A record
- The AAAA record
Each record is associated with a value made out of numbers, special characters, and letters for the TXT record.
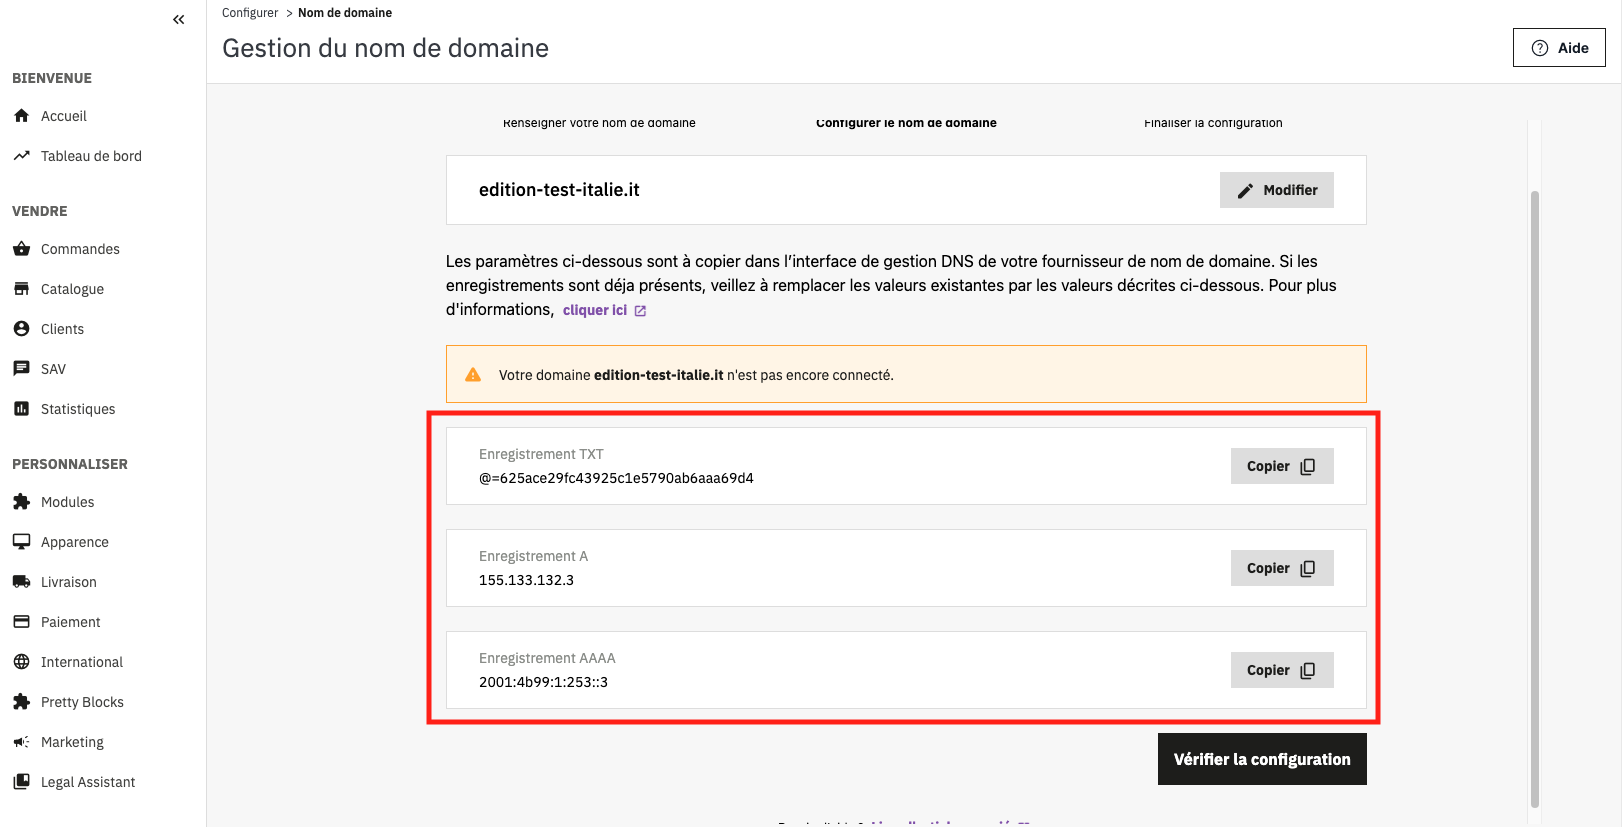
To connect your domain name to PrestaShop, you will need to copy and paste each value into the host’s domain name interface. To do so,
- Log into your account on the host’s website. As an example, we chose IONOS in this article.
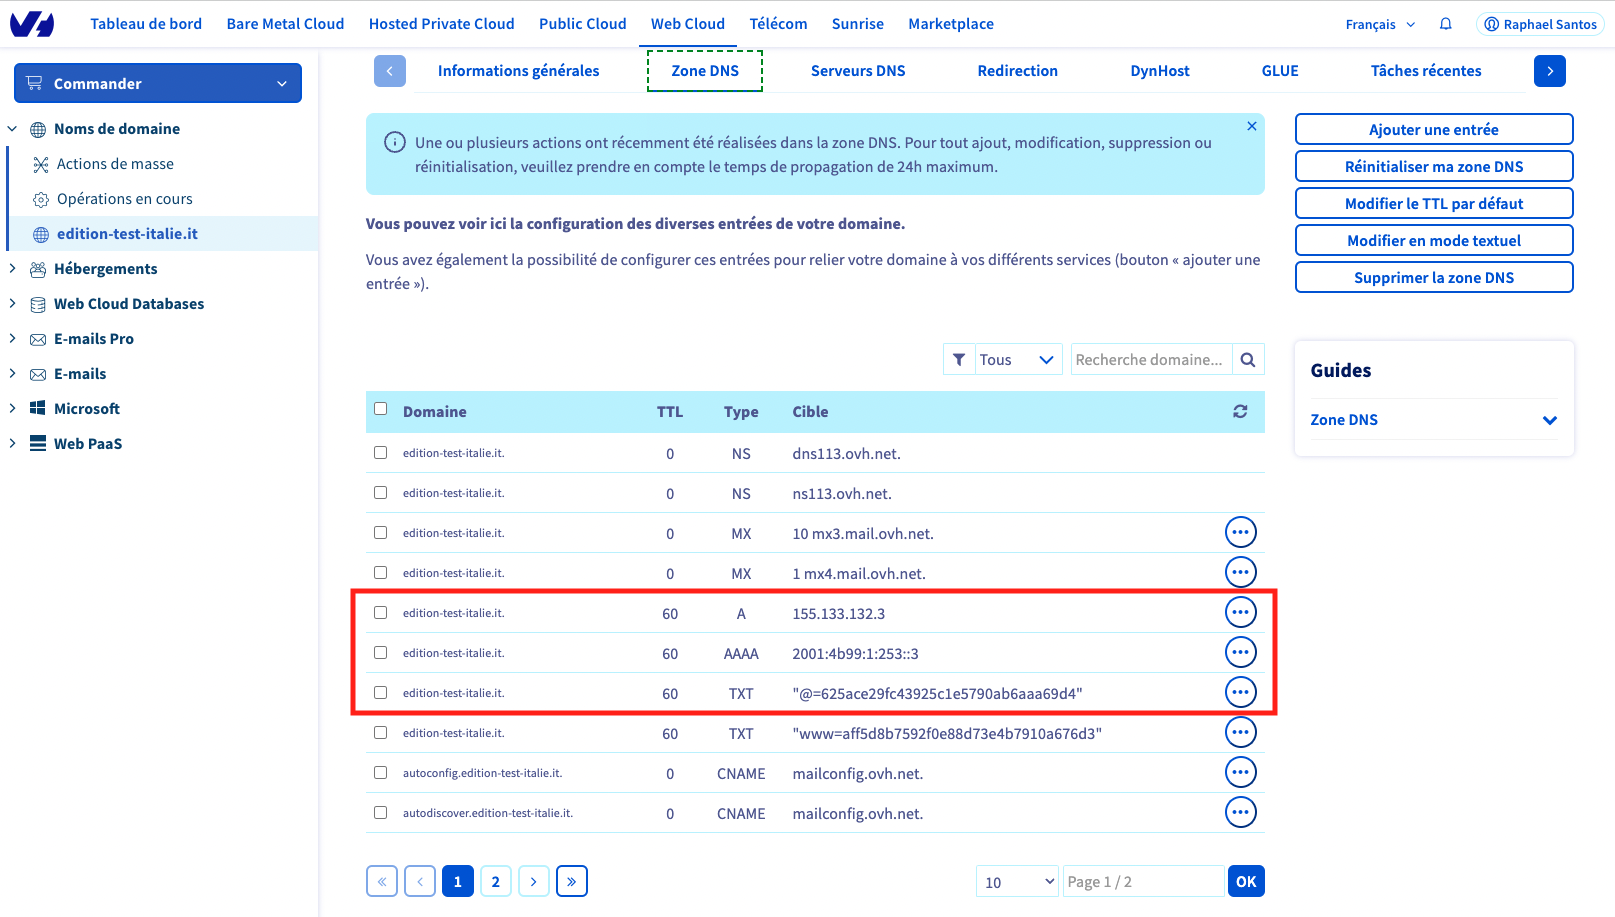
- On your host’s website, check the DNS records of your domain name.
- A list of record types is displayed. Find the record types TXT, A, and AAAA.
- For each specific record, copy the associated value into your PrestaShop back office and paste and into the Value field of your host’s interface.
- On your host’s website, save your changes. Then, go to your back office to check your setup.
|
⚠️ If you can’t find TXT, A, and AAAA records on your host’s website, you can add them manually by filling in each field (see the details below). |
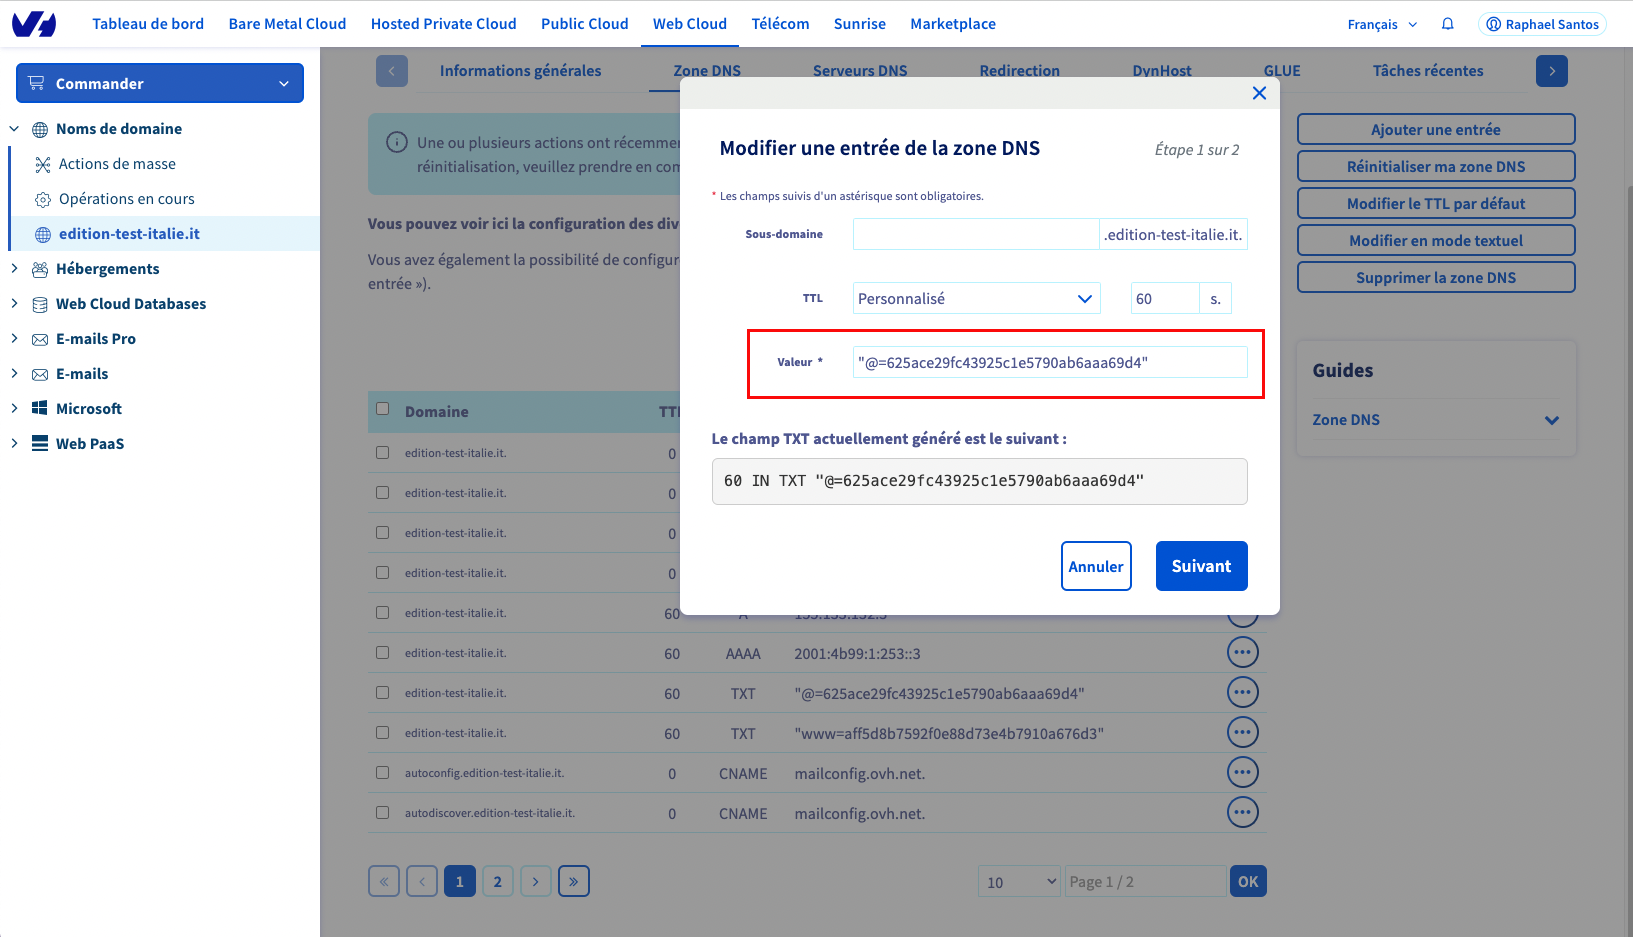
Details that must be added in each record’s field:
Type: TXT, A, or AAAA. Depends on the record you want to add or edit.
Host name: Keep the default value or leave this field blank (depends on your host).
Value: Copy the specified value in the PrestaShop Hosted back office for the selected type of record and paste it.
TTL: Keep the default value or leave this field blank (depends on your host)
Completing the setup
Once you’re done,
1. Go back to your PrestaShop Hosted back office. A success message is displayed: your domain is connected correctly. Click on Next to go to the last step.
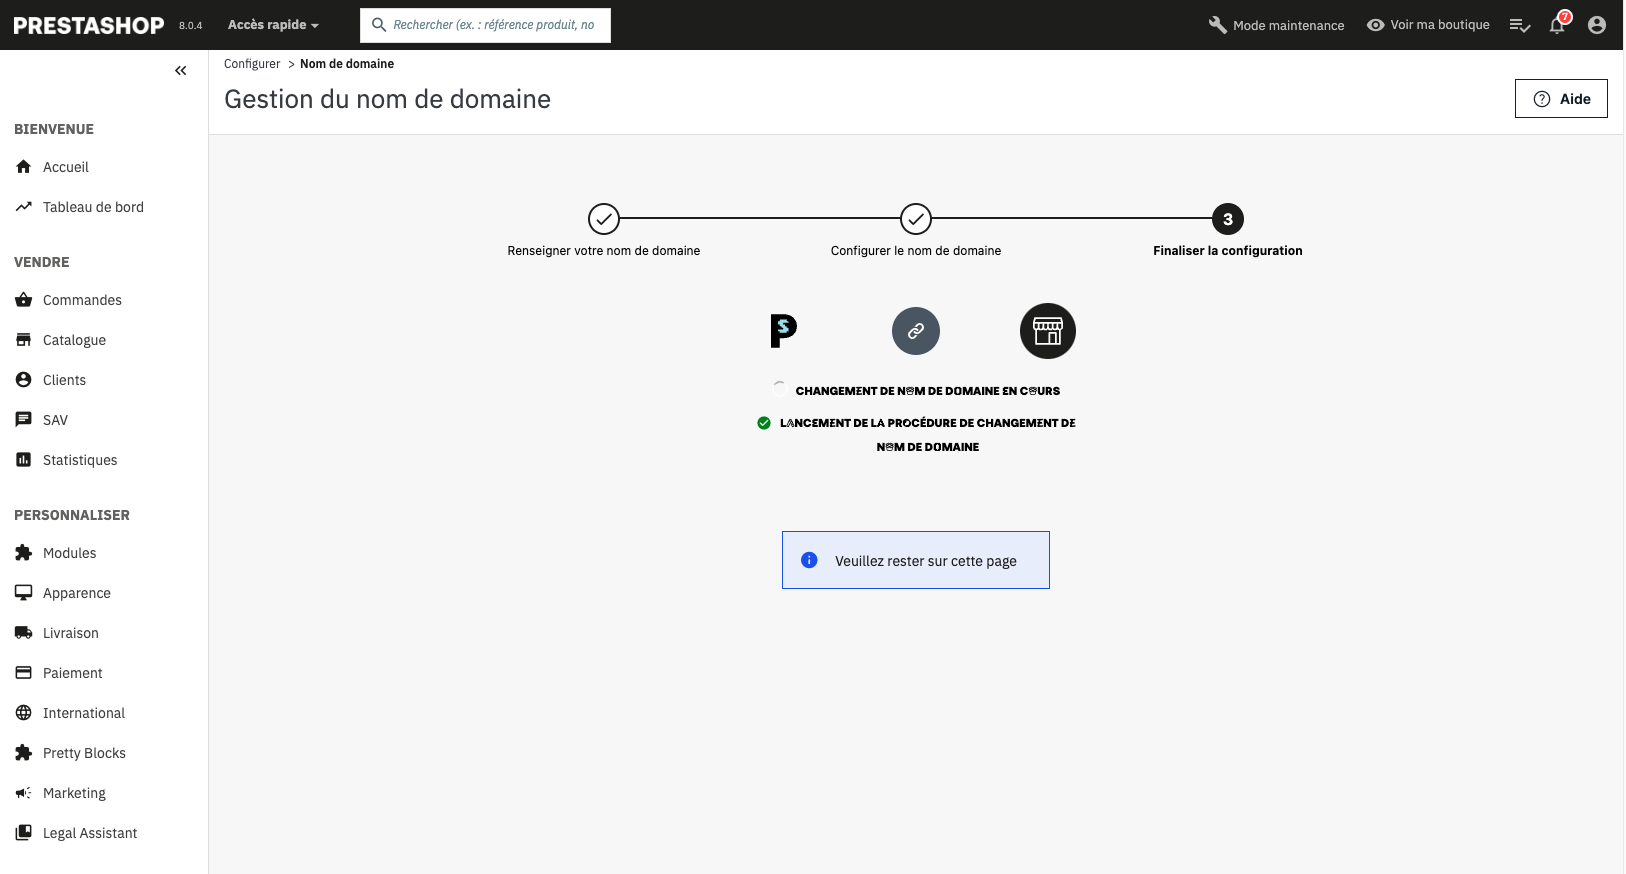
2. Stay on this page during synchronization.
3. When the Complete redirection button is displayed, click on it.
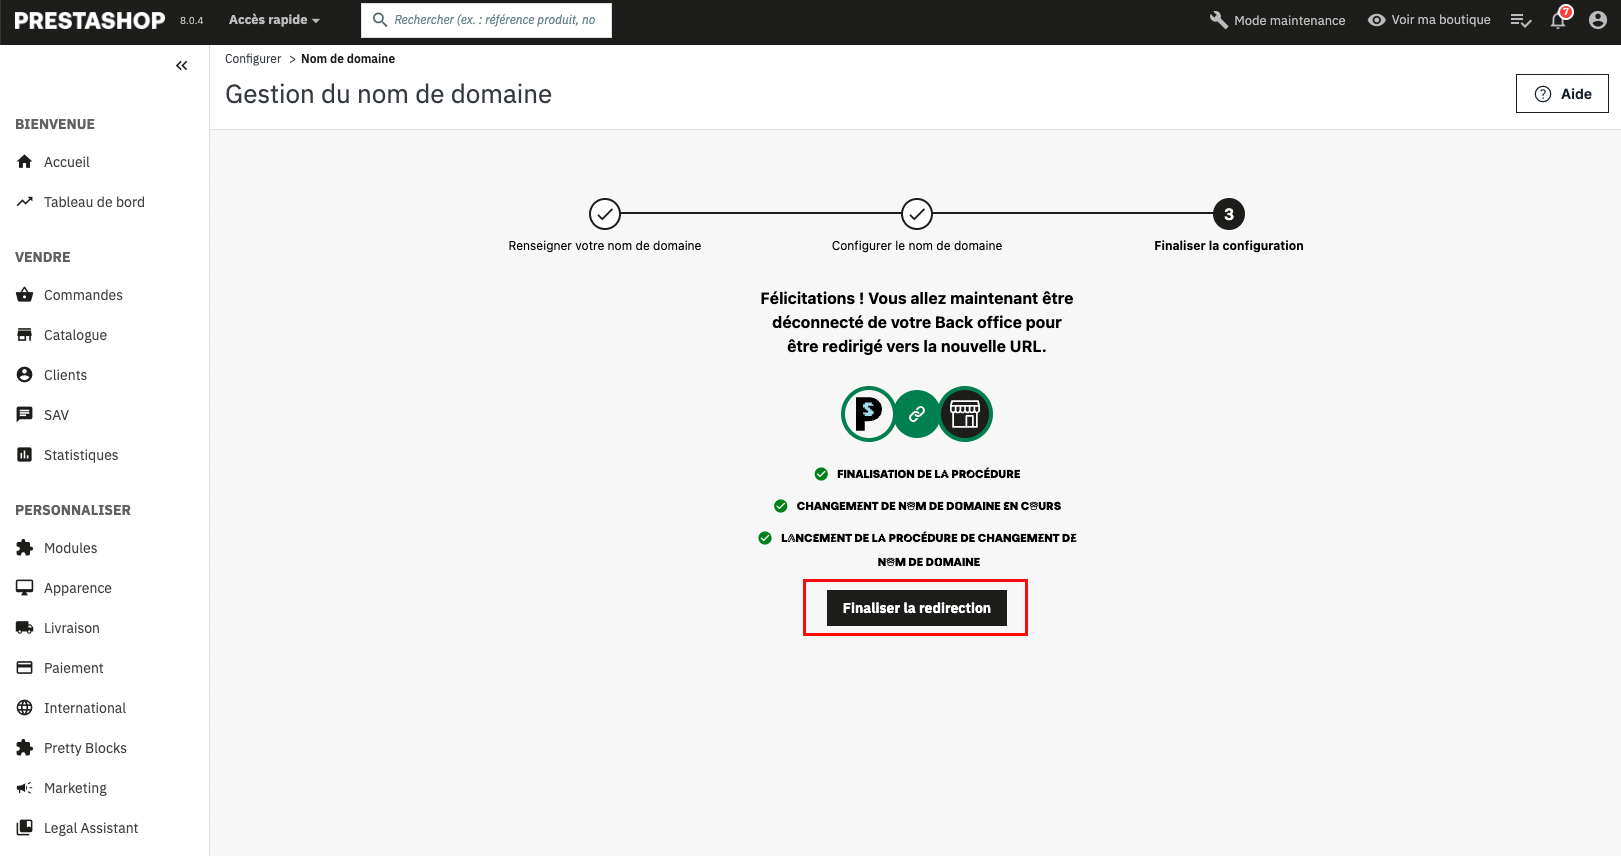
4. You are now signed out from your back office. You can sign in again from your new URL.
Share