- Help Center
- Modules
- PrestaShop Social
- Setting up PrestaShop Social
Setting up PrestaShop Social
Christophe Bernon
-Updated on Friday, October 20, 2023
PrestaShop Social allows you to easily present your products on Facebook and Instagram for people to discover and buy. You can now create advertising campaigns from PrestaShop, increase traffic and optimize the performance of your campaigns by controlling your data.
Here's a step-by-step guide.
ATTENTION: you must have filled in the Account module before configuring your PrestaShop Social module, otherwise it won't work.
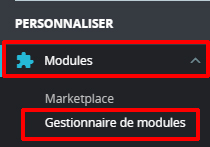
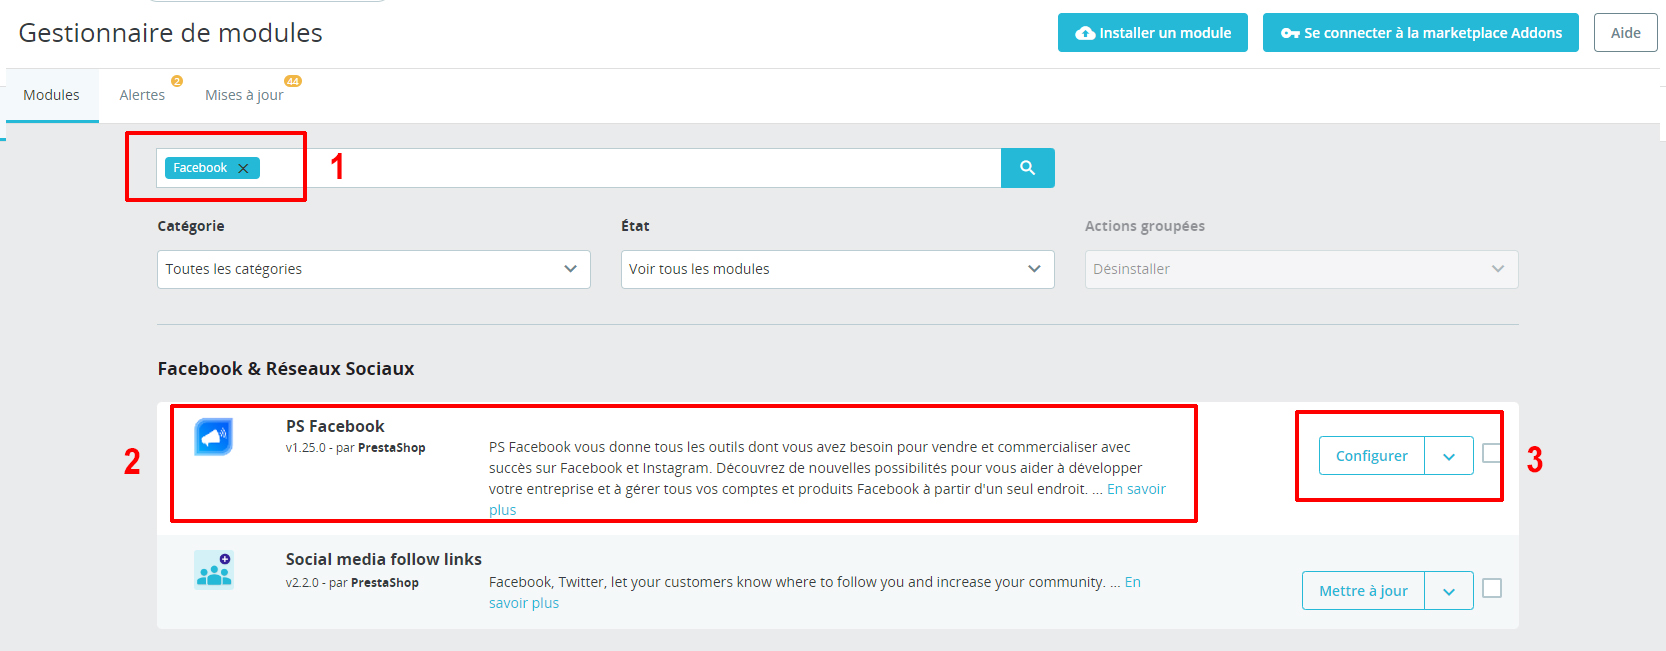
1. Go to the module configuration page
Log on to your back-office at PrestaShop and access the "Modules" section, then "Module Manager".
Find the module PrestaShop Social and click on "Configure" to access the module parameters.
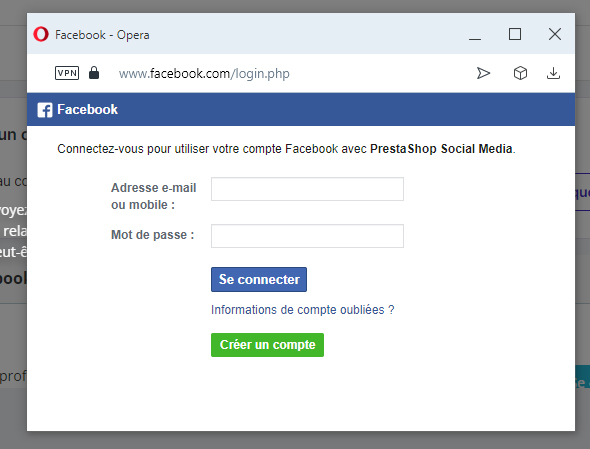
2. Log in to your account Facebook
When you reach the module configuration page, click on the "Connect with Facebook" button to link your Facebook account to your PrestaShop store. If you are not already logged in to Facebook, you will be asked to enter your login details.

3. Select your Facebook page and your advertising account
Once connected, the module will retrieve the list of your Facebook pages and advertising accounts. Select the Facebook page and the advertising account you wish to use for your PrestaShop store. If you don't already have an advertising account, you'll need to create one at Facebook.
4. Configure the Pixel Facebook
Pixel Facebook is a tracking tool that allows you to measure the effectiveness of your ads and collect data on user actions on your site. To configure Pixel Facebook, follow these steps:
- Click on "Configure Pixel Facebook" in the module parameters.
- If you already have a Pixel Facebook, select it from the drop-down list. Otherwise, click on "Create a new pixel" and follow the on-screen instructions.
- Once Pixel Facebook has been selected or created, click on "Save" to complete the configuration.
5. Synchronize your product catalog
To make your products available for advertising Facebook, you need to synchronize them with Facebook. Follow these steps to configure catalog synchronization:
-
Go to the "Configure product catalog" section
On the PrestaShop Social module configuration page, click on "Configure product catalog" to access catalog synchronization parameters.
-
Select the product categories to be included in the synchronization. You can select all or specific categories.
-
Configure language and currency settings for catalog synchronization.
-
Click on "Save" to save your settings and launch the initial catalog synchronization.
Share