- Help Center
- Store administration
- Set up the back office
- Put a store on maintenance
Put a store on maintenance
Anne-Sophie F
-Updated on Friday, August 18, 2023
Put a store on maintenance at PrestaShop to temporarily deactivate the front office. This is very useful for making modifications without being accessible to customers or indexed by search engines. Find out how!
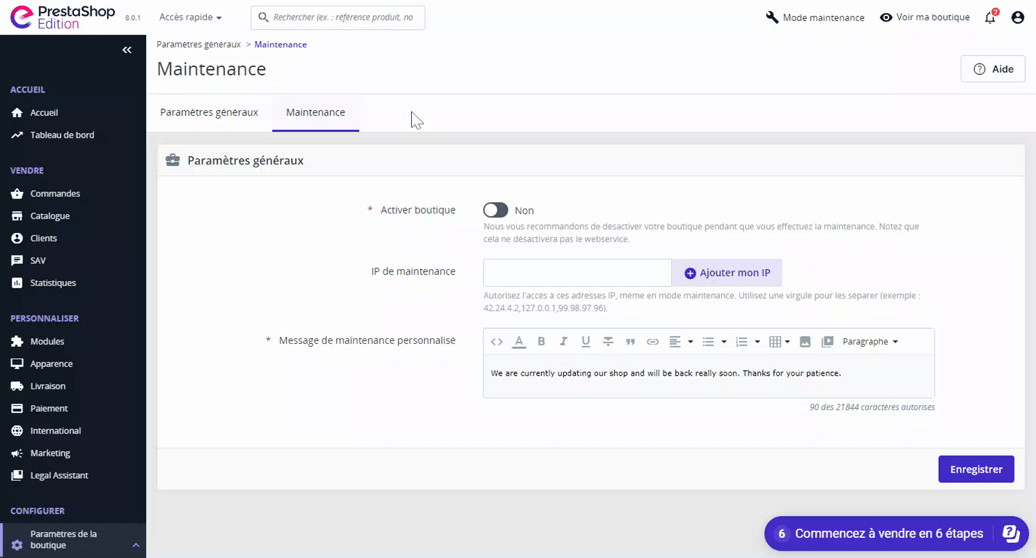
To access: Shop settings > General settings > Maintenance tab
|
💡 If you have subscribed to the Editionoffer, your store will automatically be in maintenance mode on installation. It's up to you to decide when you want to make your front office available by changing this setting! |
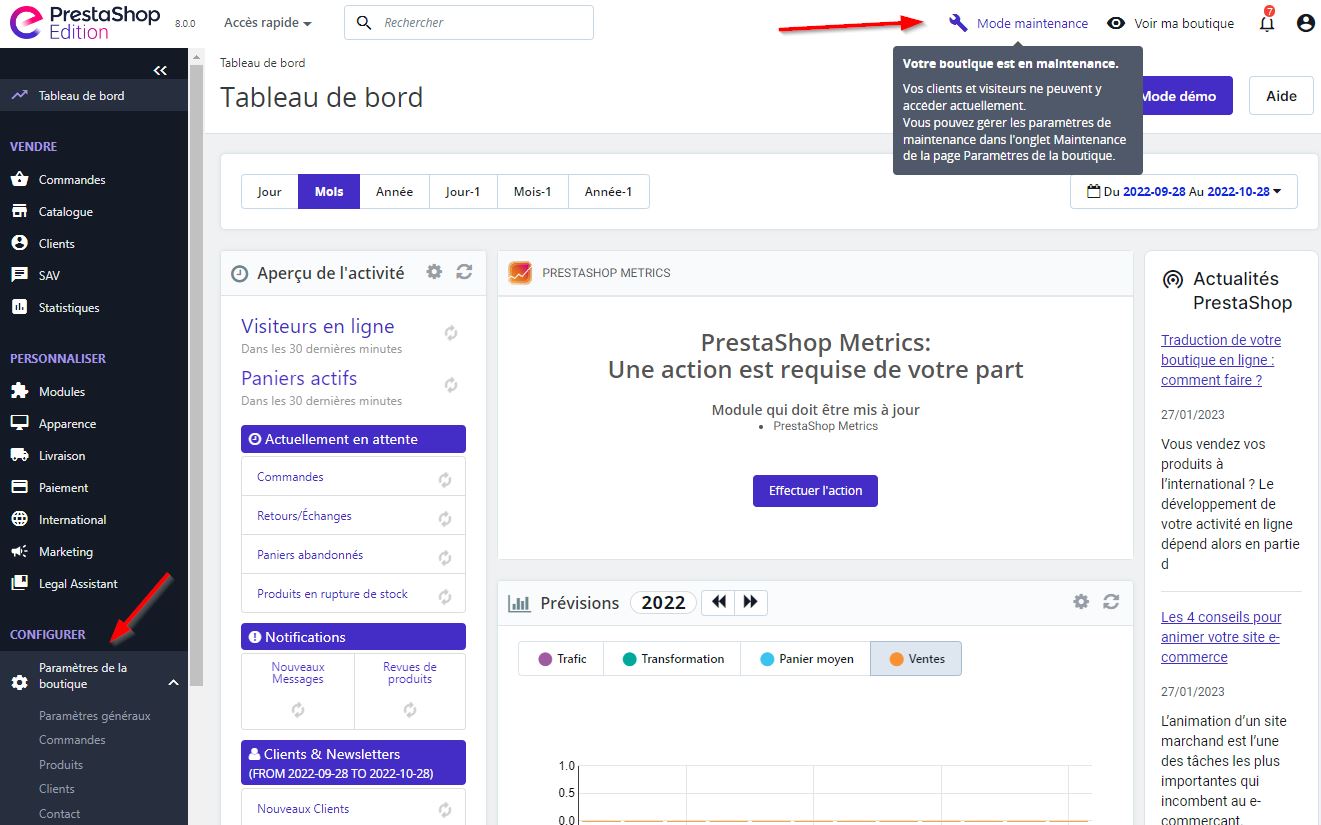
Activate or deactivate your store
To access the maintenance mode settings, you can either go to the Shop settings, or if the store is already in maintenance, click on "Maintenance mode" displayed in the top right-hand corner of your back office.
To put a store into maintenance, simply set the switch opposite the text "Activate store" to "No".
When you want to put your store back online, you'll need to set the switch back to "Yes".
Don't forget to click on "Save" for the change to take effect!
Add an IP address
If you want the front office to remain accessible to certain people even when deactivated, you can add a maintenance IP address. This will display the store from this IP address only. Click on "Add my IP" to automatically add the IP address of the computer in use. Multiple IP addresses can be entered, separated by commas (",").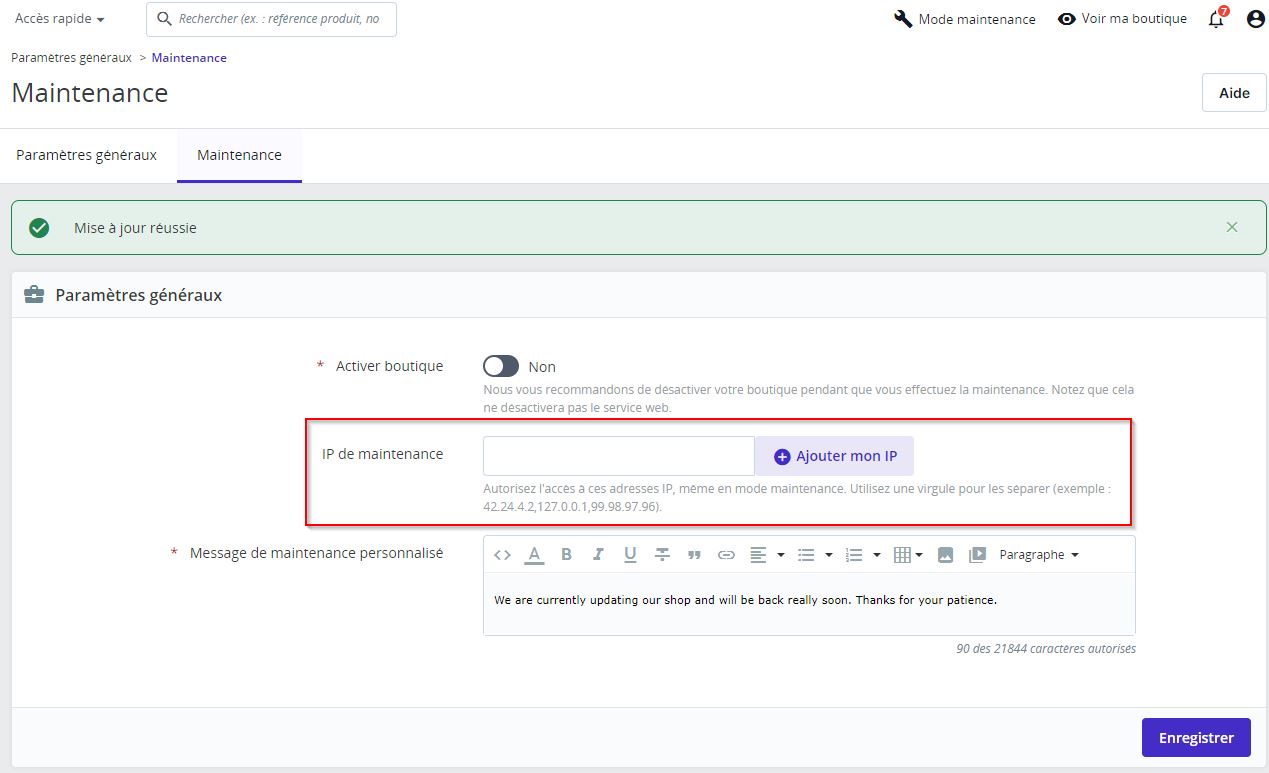
Customize the maintenance message
The personalized maintenance message lets you write a message explaining that your store is undergoing maintenance and will soon be available. It will be displayed on your store's deactivated front office to inform your customers.
If the message has not been customized, the default screen will be as follows:
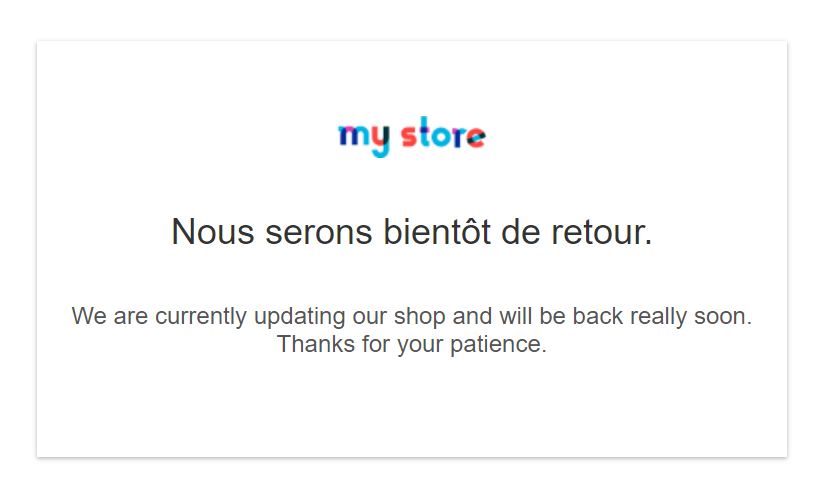
Please note: the logo displayed on this front-office message is the one defined in the Appearance menu, then Theme and logo. See our article on the subject. The phrase "We'll be back soon" can be modified from the International menu, then Translations. This other article will tell you more about how to modify this element.
Related articles
Share