The PrestaShop product sheet allows you to showcase your catalog. Let's see together how to configure it to the best of your ability to boost your sales!
To access it: Catalog > Products
Navigate through the product sheet
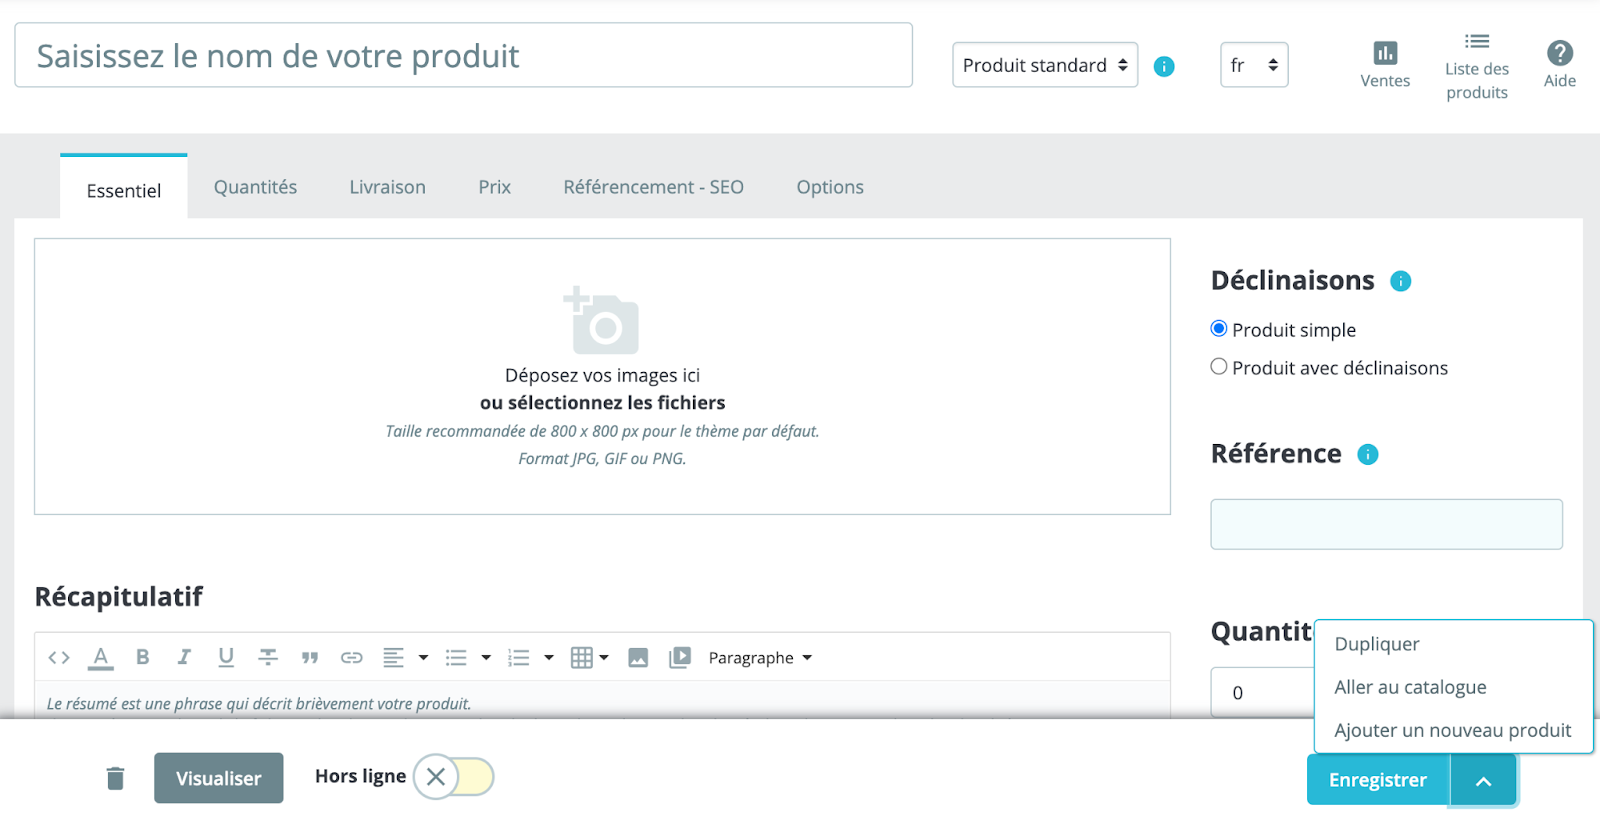
You can begin to enter the basic information in this box, located at the top of the creation form.

- Product name: the name of your product is very important. Indeed, it appears as is in the search engine results. Please consult our dedicated article to learn more about SEO.
- Product nature: specify whether it is a standard product, a dematerialized product or a product pack. In this case, it will probably be a standard product.
- Languages: choose the language in which you wish to sell your product.
- Sales: this button allows you to access the "product details" page of the statistics table, and to obtain the number of views and sales of your product in an instant.
- List of products: this button allows you to open a side list containing the list of your products.
- Help: To obtain information on how to fill in your product sheet.
Action buttons
At the bottom of the product sheet, a bottom bar allows you to access the basic actions:
- Delete: using the "trash can" icon, delete all the product data on this sheet, as well as its data (images, variations, features, etc.).
- Preview: display the homepage of your product as if you were a customer.
- Online or offline: define whether the product will be visible or not to internet users on the site. We advise you to leave the product offline until it is finalized.
- Duplicate: create an exact copy of the product you are creating.
| 💡 This is particularly useful if you want to use the product in progress as a basis for a new product, without having to recreate everything by hand. For example, two products can be very different, but have the same product associations, the same carriers, or the same supplier. However, if you wish to create different versions of the same product, we recommend that you set up variations of this product rather than duplicating it indefinitely. Indeed, duplicate content could penalize your search engine optimization. |
- Save: if you wish to change tabs without losing the modifications made to the current tab, or if you want to apply your modifications immediately.
- Go to the catalog: to save all the modifications you have made to any of the product tabs, and then return to the product list.
- Add a new product: to save the product sheet you are currently on, and move on to creating a new product sheet.
How to describe your product?
To write a complete description of your product. The text editor gives you access to a large number of options to create a visually appealing description (font, size, color, etc.).
| 💡 If the second field is not limited in characters, avoid putting too many in it! Conciseness is key. |
How to define your quantities and availability?
The "Quantities" tab allows you to adjust the following parameters:
- The quantity
- The minimum quantity
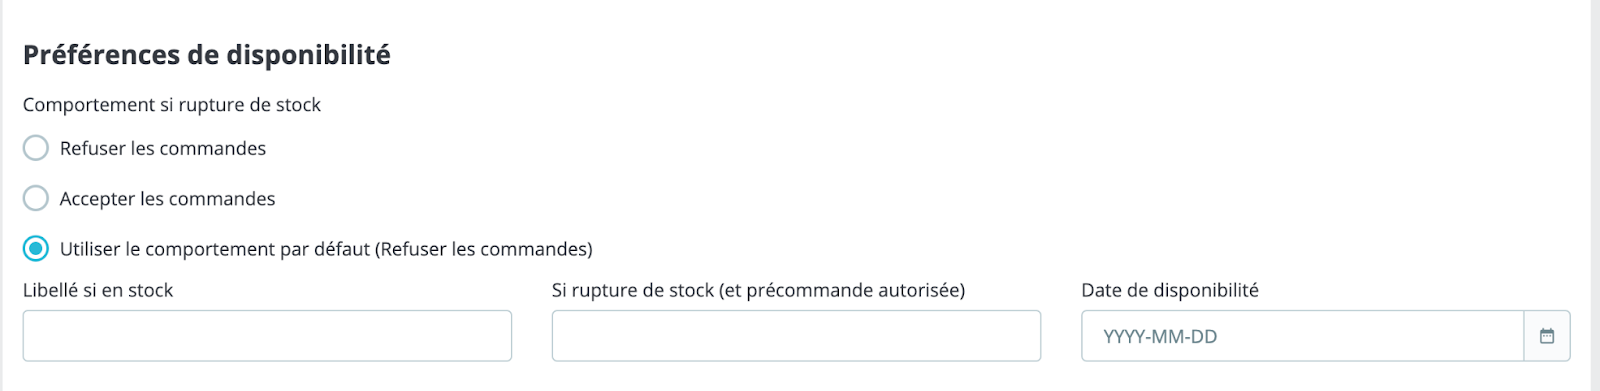
- Availability preferences
In the "Quantities" tab, you can also set up the sending of an email to be notified in case of low stock. The availability preferences allow you to set the default behavior of PrestaShop in case of stock shortage. Several options are available to you:
- Refuse orders
- Accept orders (and thus engage in pre-sales)
| 💡 You can also configure the global setting to be applied to all products. The default setting is to decline orders in the event of stock unavailability, but you can change this in the Shop Settings > Products page. |
How to choose the category for your product?
The "Categories" column allows you to choose the categories in which your product will appear. To view all the categories created, simply open the tree structure by clicking on the arrow in front of the "Home" heading.

You can also add a new category by clicking on the "Create a category" button and then entering a name in the field provided for this purpose. You then simply need to click on the "Create" button.