In this article, you will learn how to connect the domain name you purchased to your PrestaShop Hosted store.
The goal is to replace the default format maboutique.mypresta.shop with a custom domain name of type maboutique.fr.
|
💡 A custom domain name enhances your brand image and the visibility of your store. This increases your visibility on search engines and reassures your visitors. |
Prerequisites
- You have already purchased a domain name from a provider. For example: Gandi, GoDaddy, IONOS, OVH, or others.
- You are logged into your account on your provider's website.
- You are also logged into your PrestaShop Hosted back office.
What awaits you
The connection of your domain name to your PrestaShop Hosted store will take place in 3 main steps:
- First, you will enter your new domain name in your PrestaShop Hosted back office.
- PrestaShop will then display 3 values that you will need to copy and paste on your provider's site to establish the connection.
- Back in the PrestaShop Hosted back office, you will be able to finalize the connection of your new domain name with 1 click.
Connect a domain name.
Provide the domain name
In your PrestaShop Hosted back office:
- On the homepage of your back office, click on Change my domain name. You can also access this page from the left menu (Store Settings > Domain name).
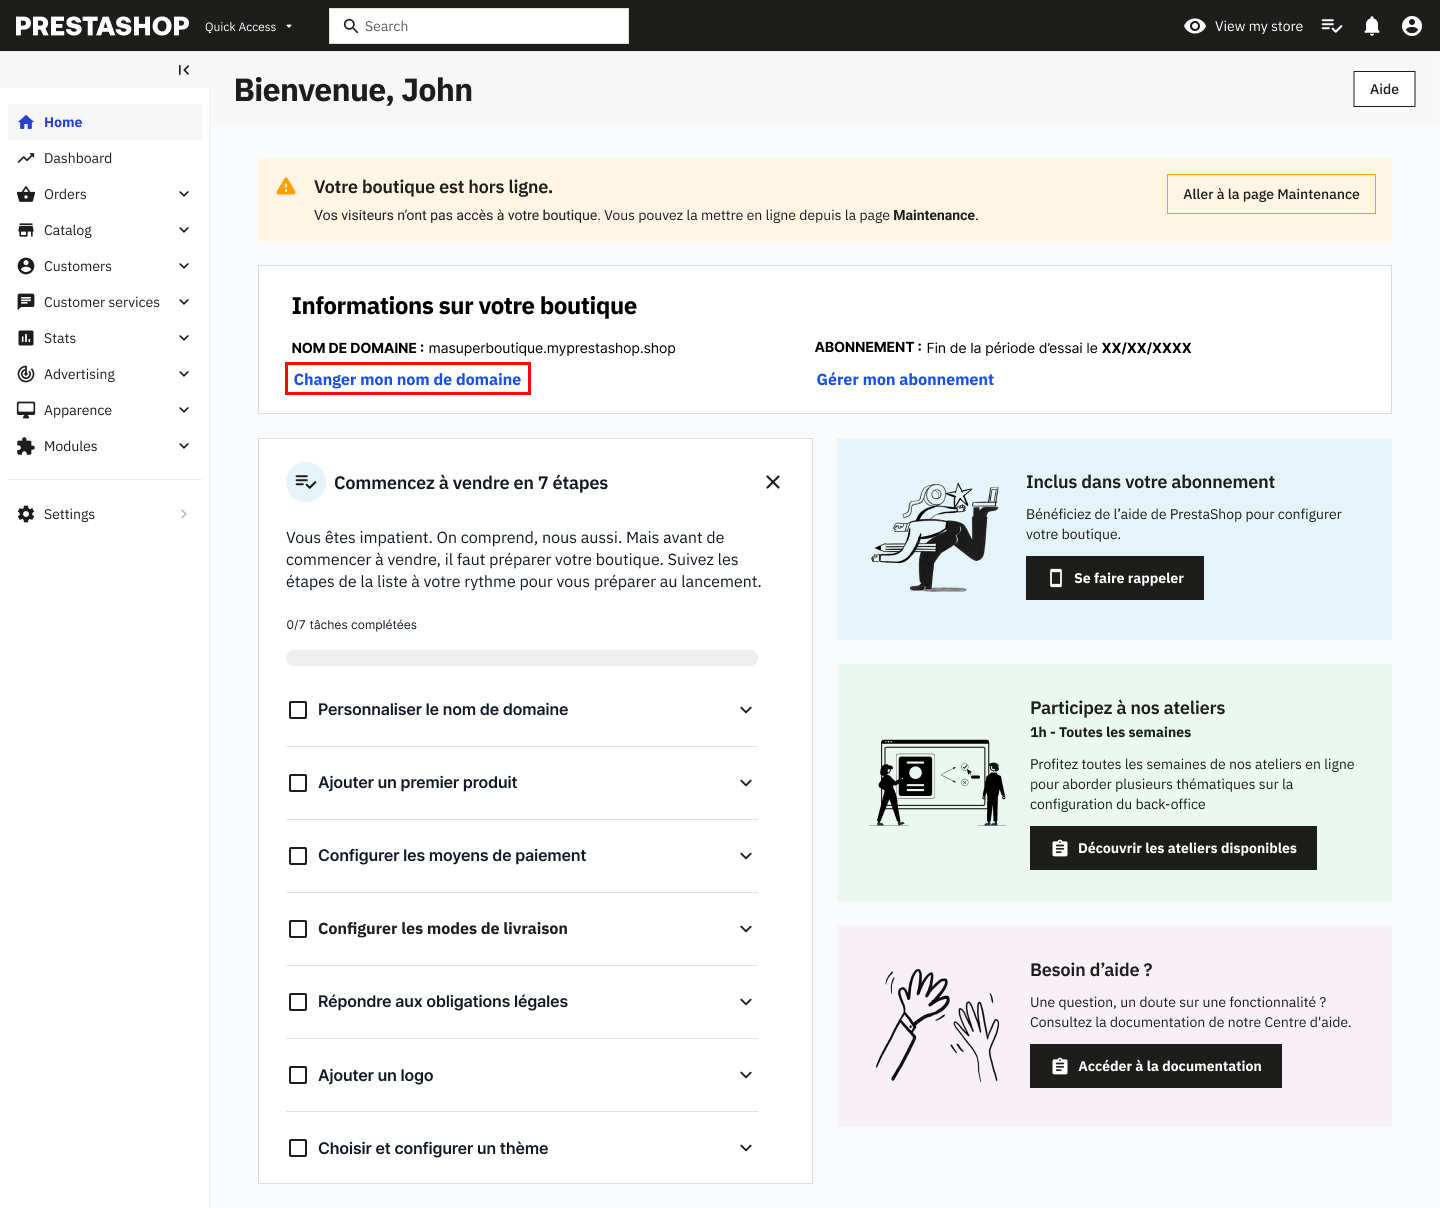
- Click on Connect an existing domain.

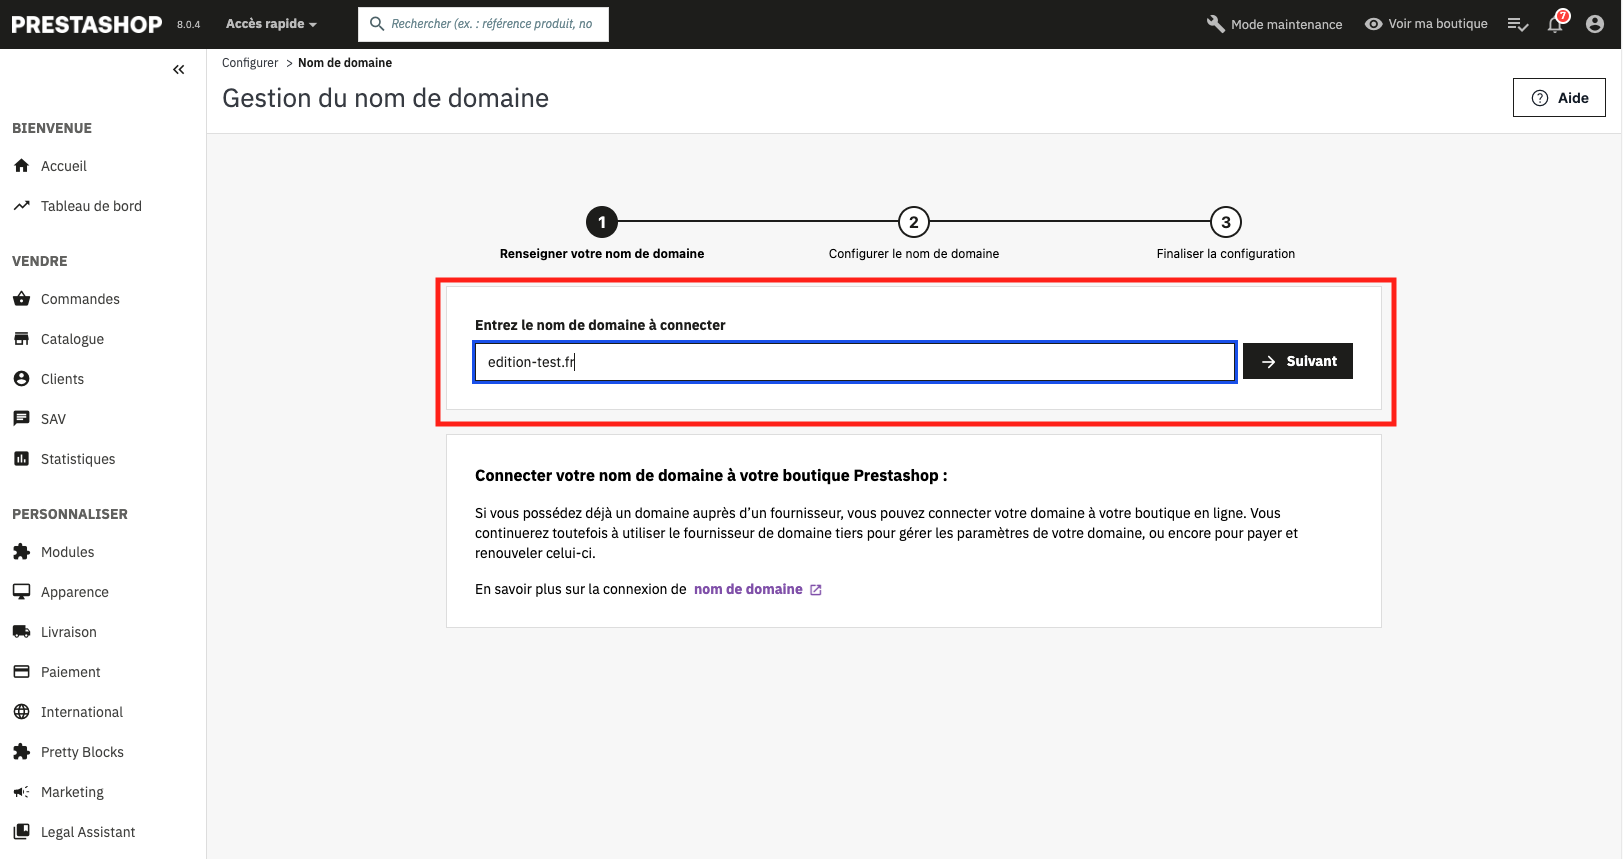
- Enter your domain name, for example maboutique.fr, then click on Next.
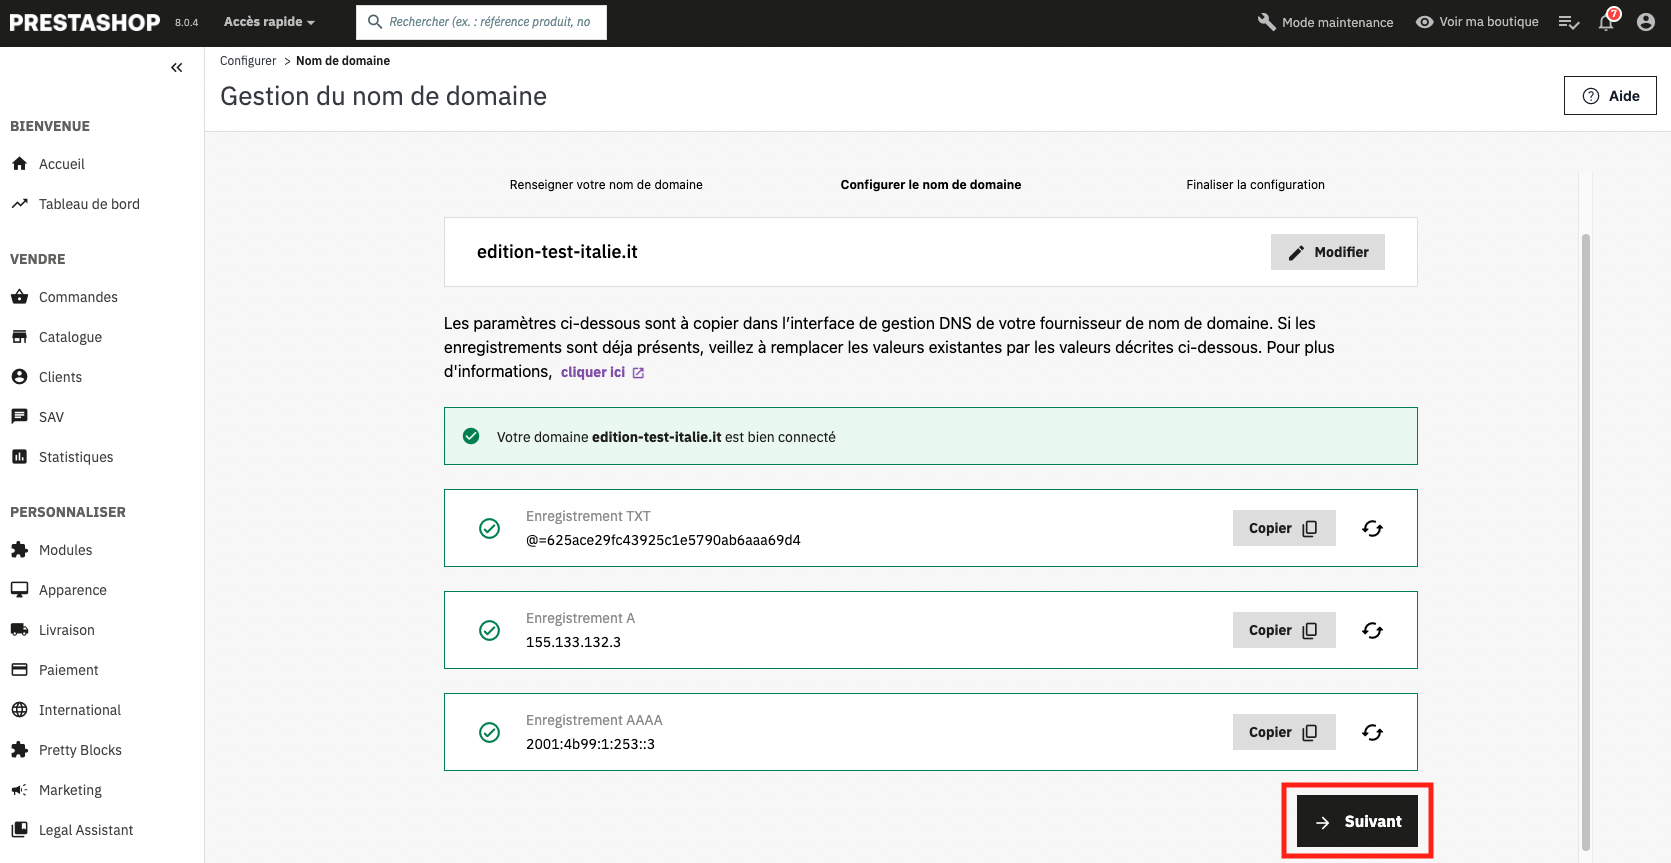
Configure the domain name.
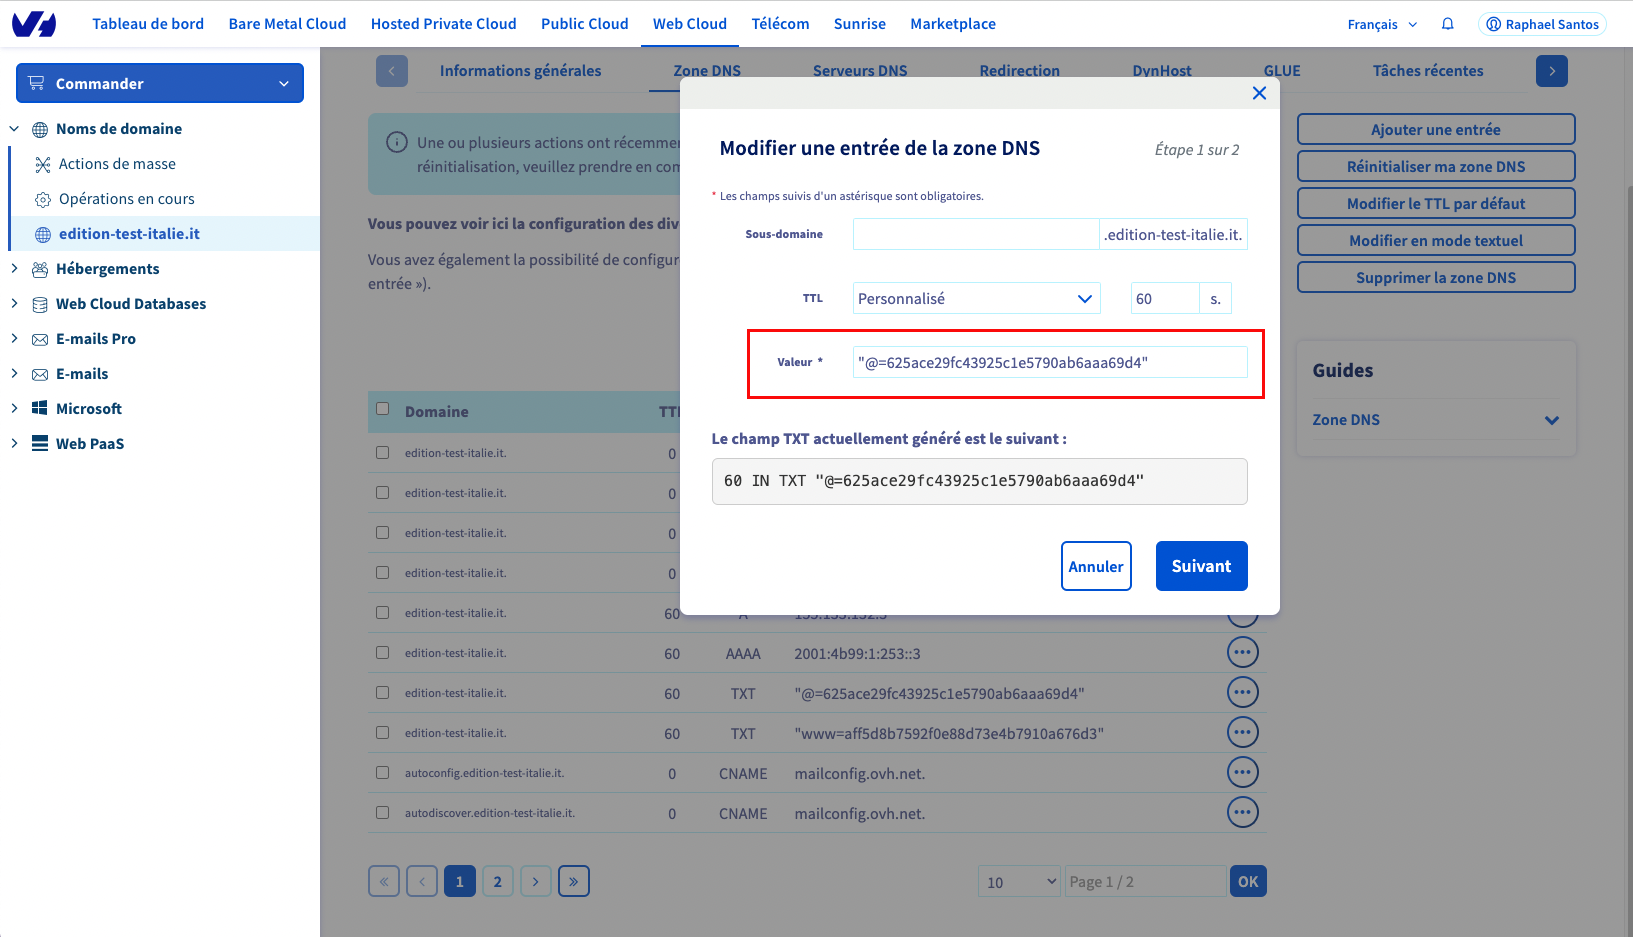
PrestaShop displays 3 types of records:
- The TXT record
- The A record
- The AAAA record
For each type of record, a value is specified (composed of digits, special characters, and letters for the TXT record).
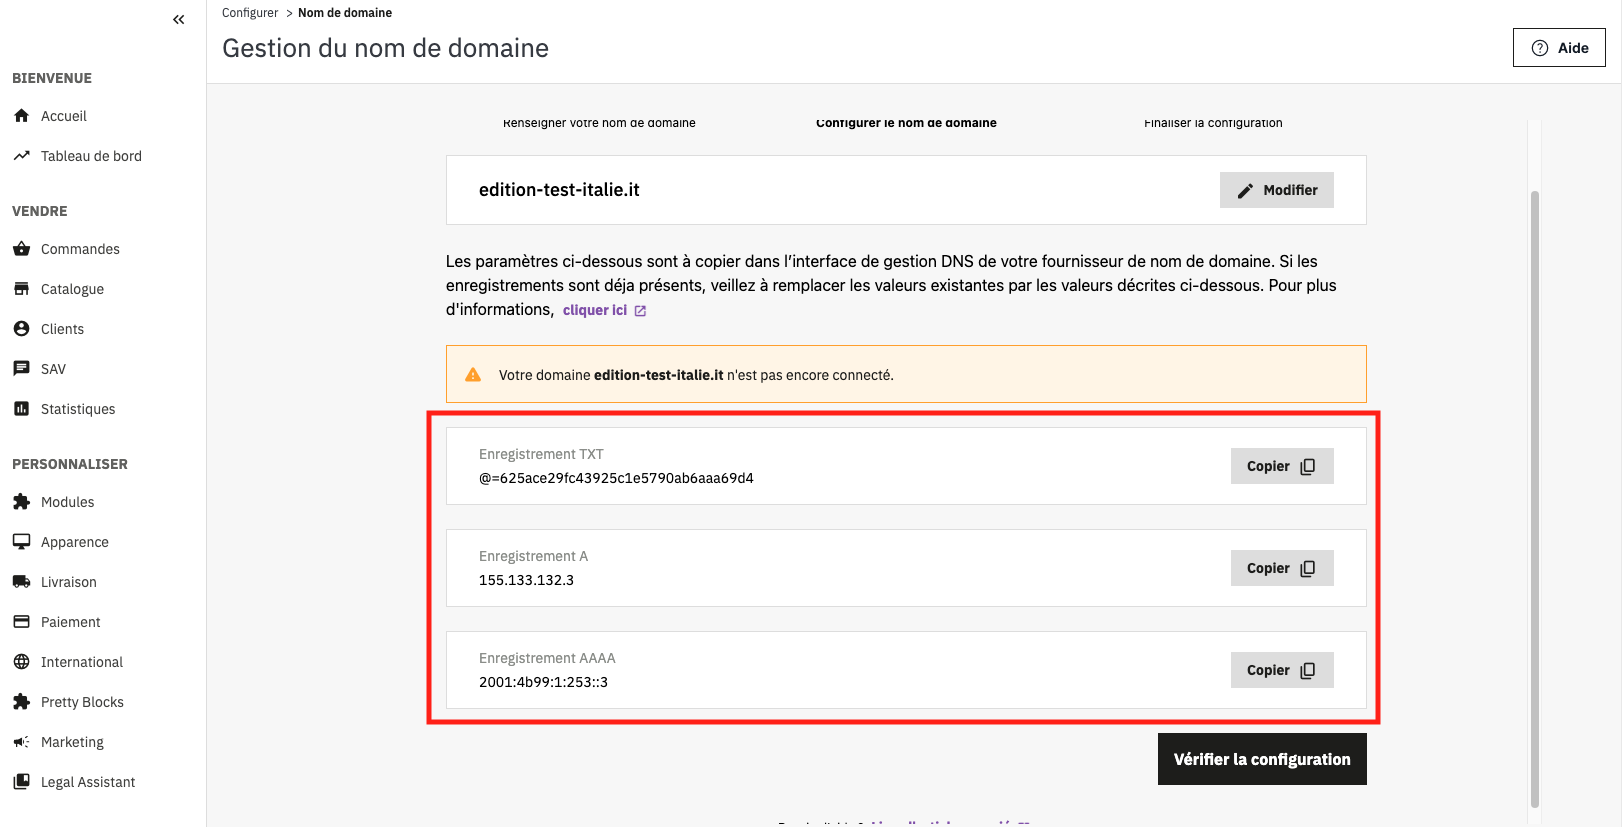
To connect your domain name to PrestaShop, you will need to copy each value and paste it into the interface of your domain name provider. To do this:
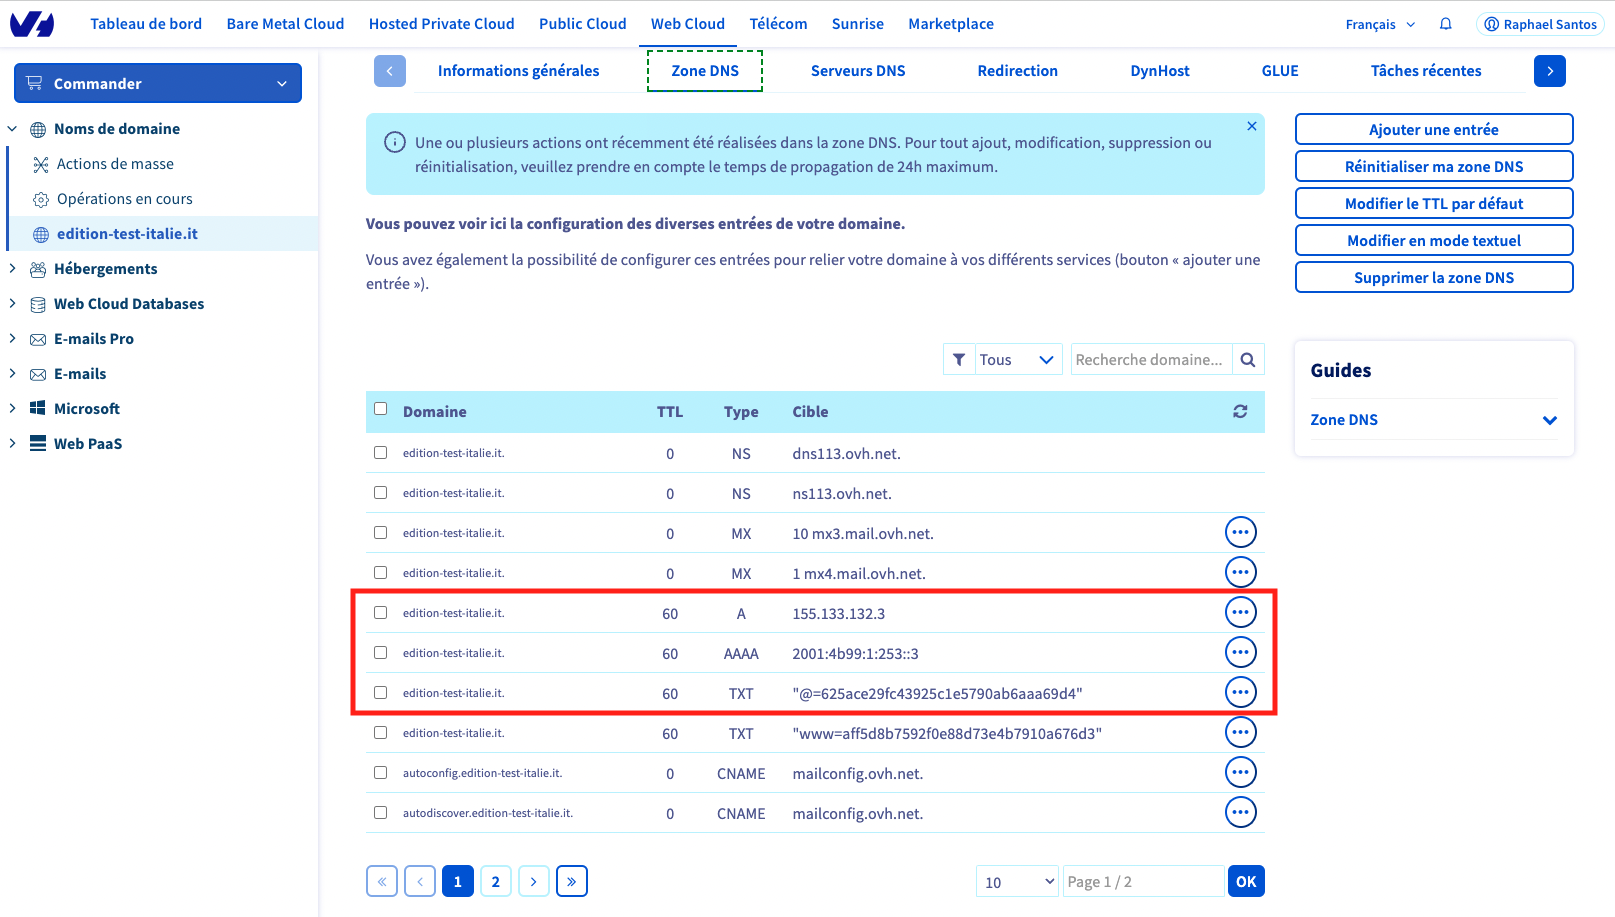
- Log in to your account on your provider's website. For this article, we have used the provider IONOS.
- On your provider 's website, navigate to the DNS records of your domain name.
- A list of record types will be displayed. Locate the TXT, A, and AAAA record types.
- For each record, copy the value provided in your PrestaShop back office and paste it into the Value field on your provider's side.
- Save your changes on your provider's site and return to your PrestaShop back office to verify the configuration.
|
💡 If the TXT, A, and AAAA records are not already created on your provider's side, you can add them manually by completing each field (see below). |
Details of the fields to complete for each record:
Type: TXT, A, or AAAA depending on the record you are adding/modifying.
Host name: Use the default value or leave the field empty (depending on the provider).
Value: Copy the value indicated in the PrestaShop Hosted back office for the relevant record type and paste it.
TTL: Use the default value or leave the field empty (depending on the provider).
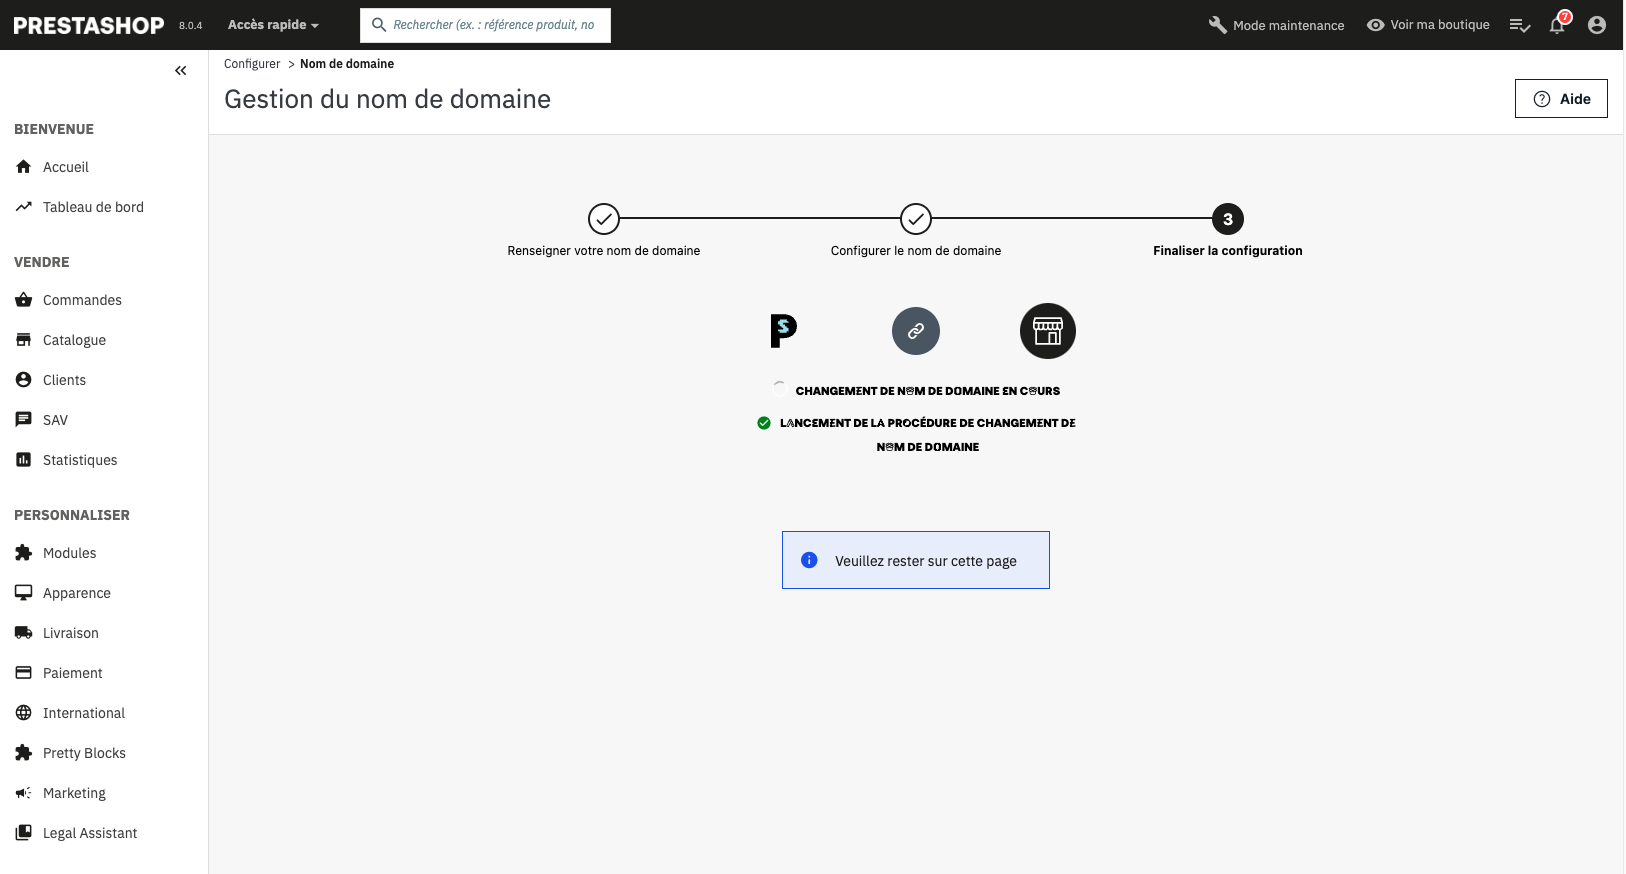
Finalize the configuration.
Once completed:
- Return to your PrestaShop Hosted back office. A success message appears, indicating that your domain is successfully connected. Then click on Next to proceed to the final step.
- Stay on the page during the synchronization.
- When the Finalize Redirection button appears, click on it.
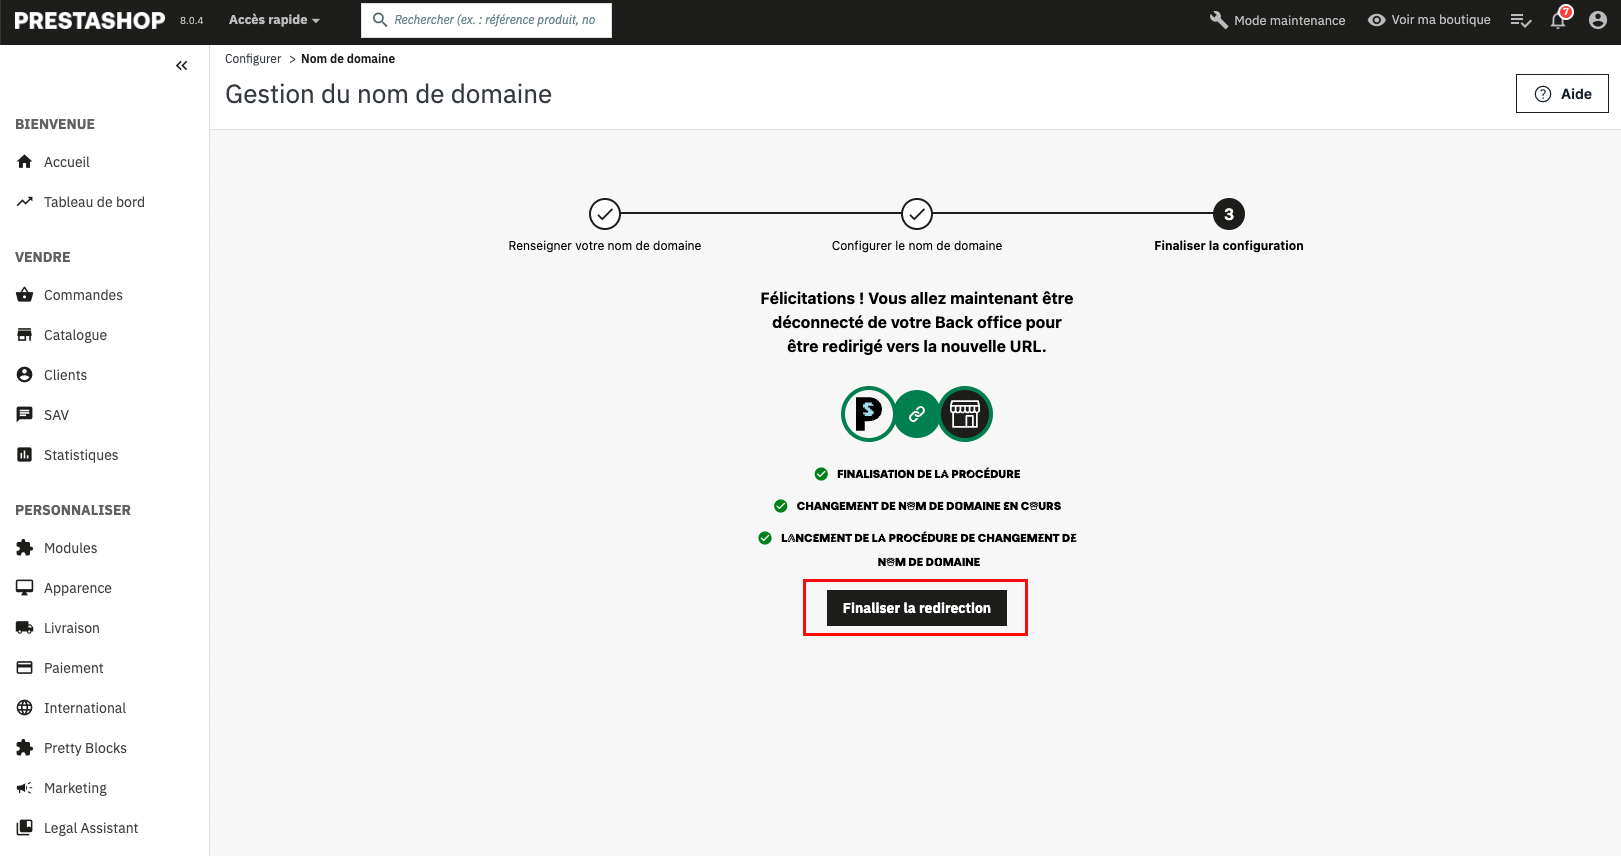
- You will then be logged out of your back office. You can reconnect using your new URL.