Categories help to streamline the customer experience by compartmentalizing your products while optimizing your search engine optimization. Discover how to create your categories on PrestaShop!
To access: Catalogue > Categories
What is a category?
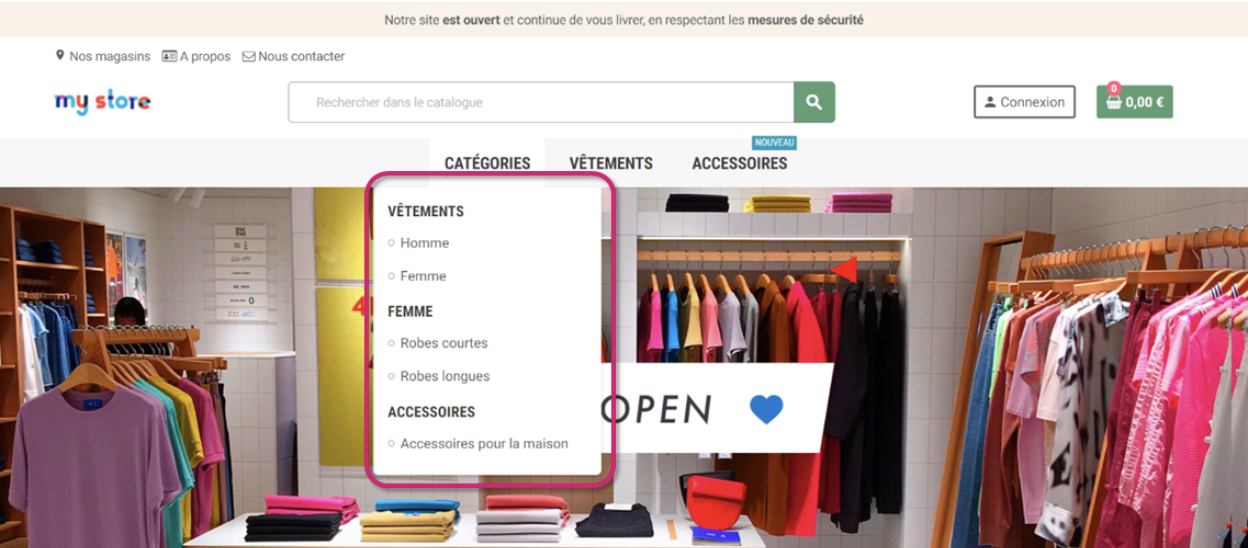
Categories allow you to group products with the same characteristics. They help customers navigate through your numerous products and thus simplify their shopping experience.
There are two types of categories:
- The parent category is the main category. Example: "Clothing", "Accessories", etc.
- The child category is a subcategory of the main category (= parent category). Example: "Women" could be a subcategory of the "Clothing" category.
| 💡 PrestaShop does not limit the number of child categories. However, keep in mind that the deeper the tree structure, the more likely the customer is to get lost. |
How to add a new category?
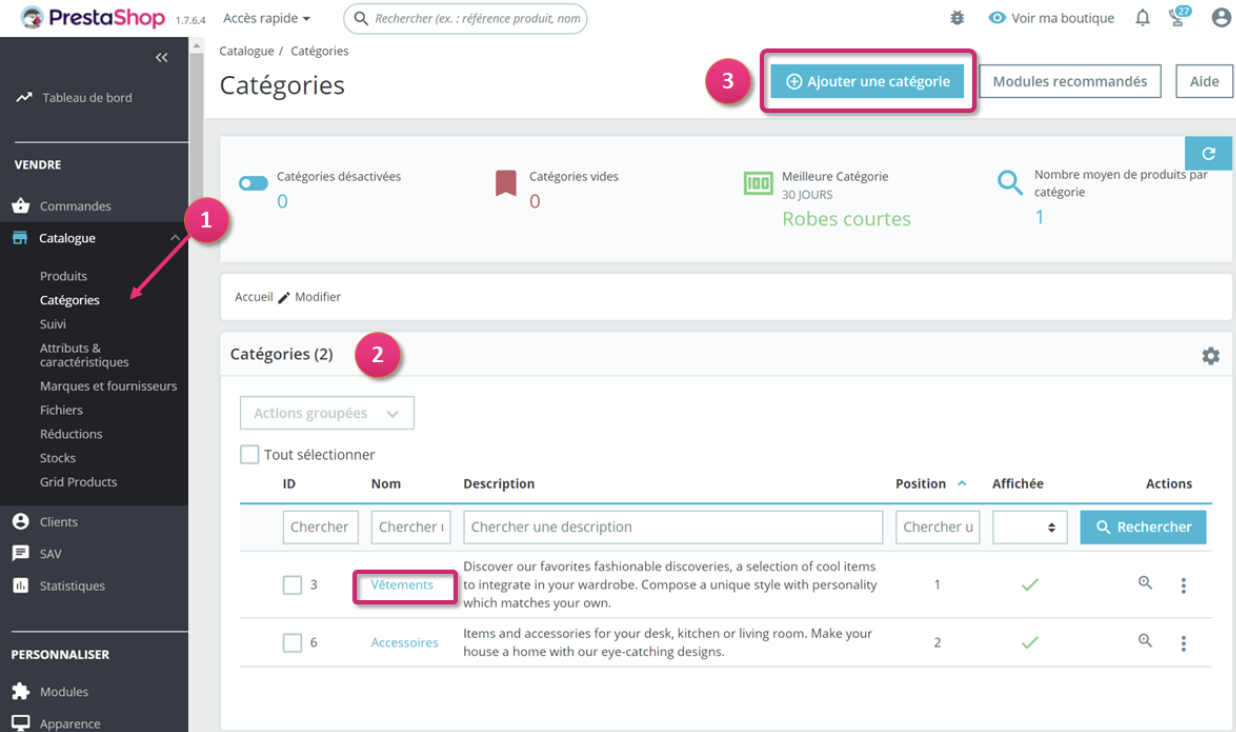
Click on "Add a category" (step 3). You will then have access to a form that allows you to deploy the existing parent categories. Click on the name of the category to view the associated child categories. Fill in the category fields:
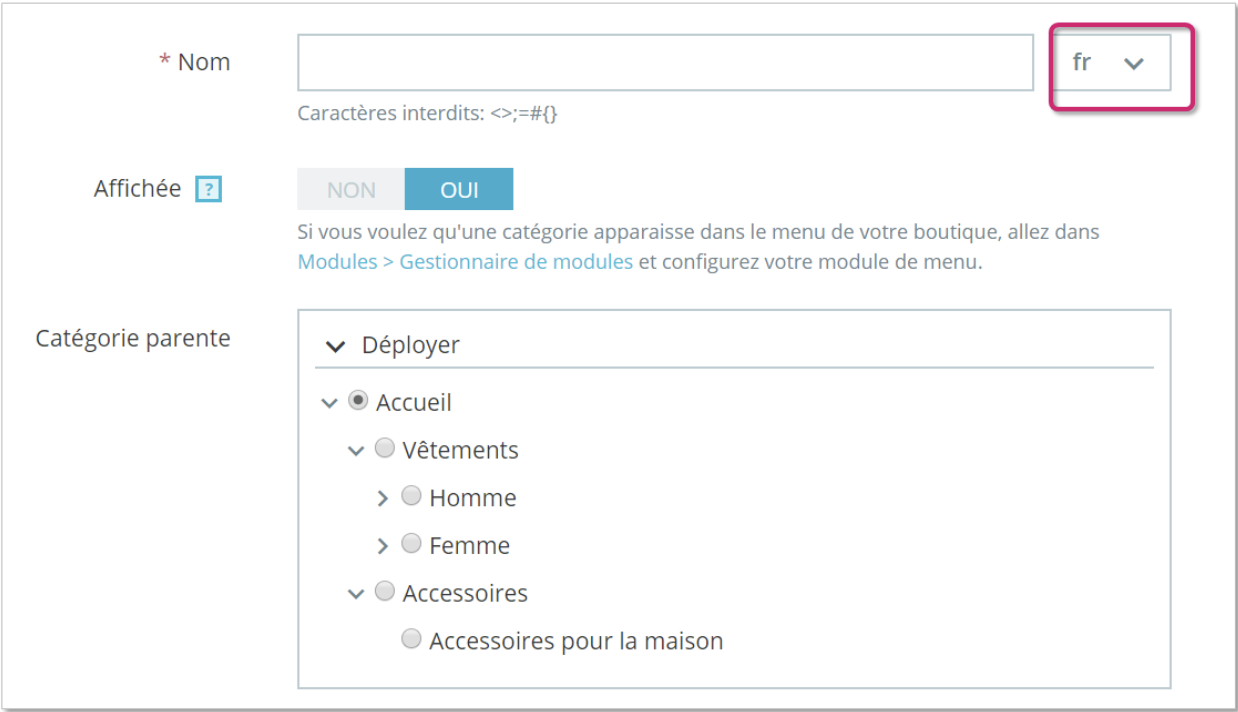
- Name : name the category. Use a short and descriptive name.
- Displayed: indicate whether you want your category to be visible (i.e. activated or not). For example, you may only want to publish the category once all the products have been placed in it.
- Parent category : does not appear when creating a parent category. If you wish to create a sub-category belonging to a category other than the home page, you can choose it in this selector.
| 💡 Please make sure to translate each field in all the languages used by your store using the language selector on the right. |
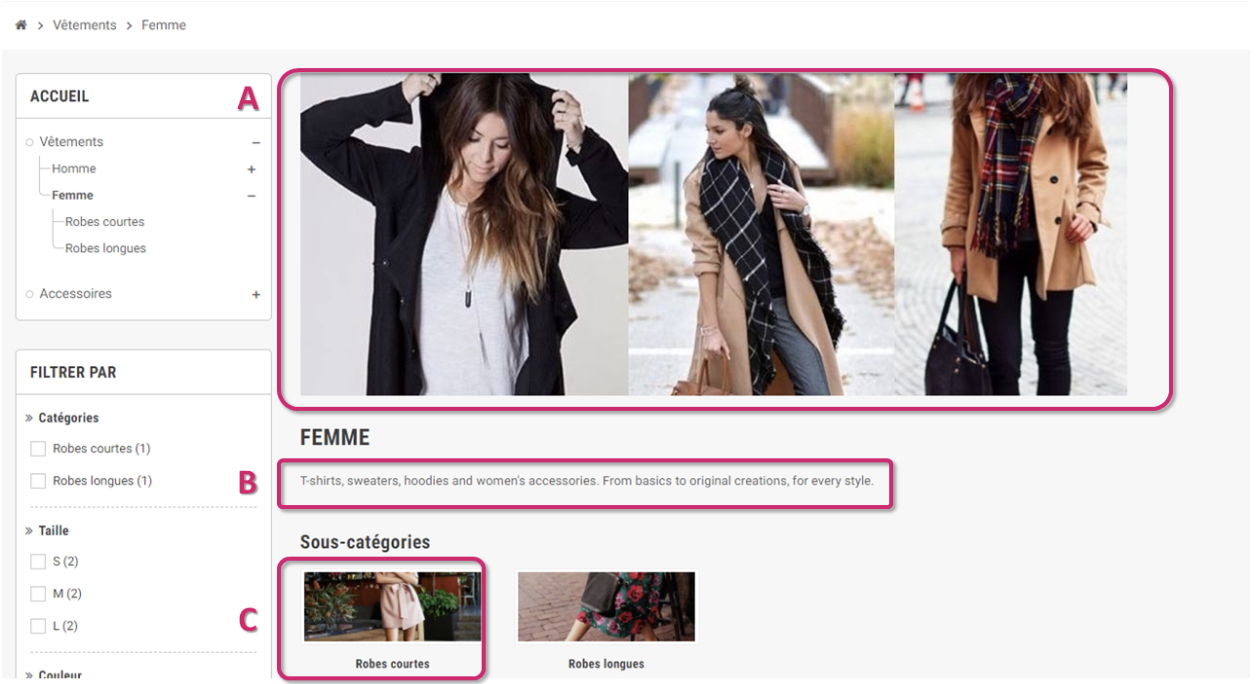
Here's what the fields correspond to in the "Women" category:
- A - Description: description of the category
- B - Cover images: main image of the category that appears on the category page
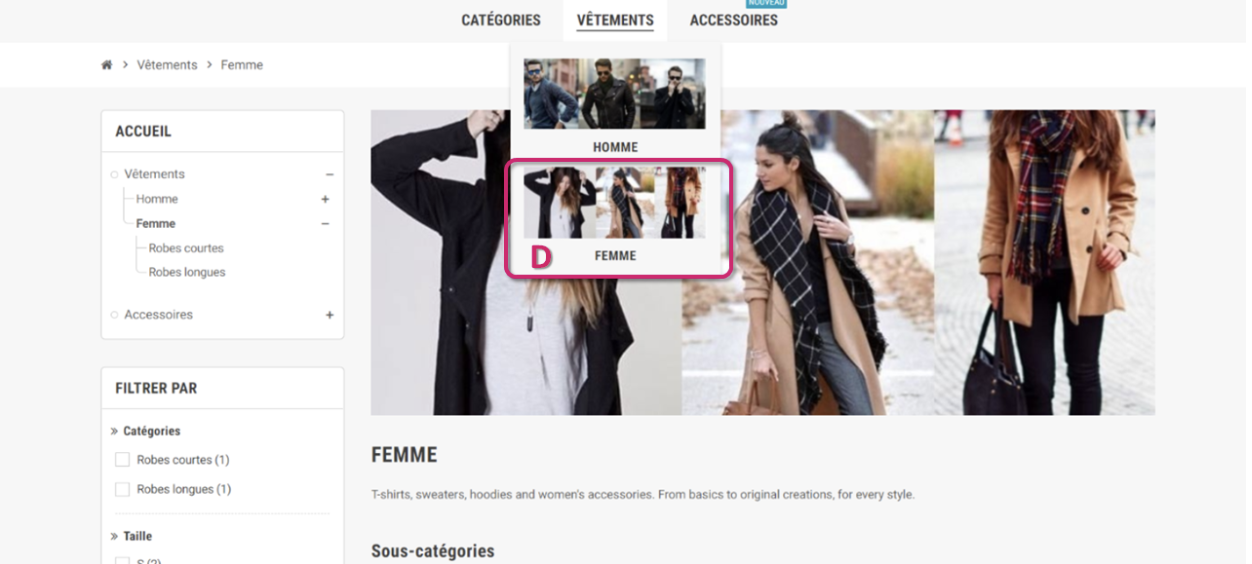
- C - Category thumbnail: displays a small image on the parent category page
- D - Menu thumbnail: displays a small image in the menu to represent the category
How to optimize your category SEO?
SEO is key to the success of your store, and well-indexed categories allow you to optimize your SEO. To better understand, here's how your categories appear in search engines.
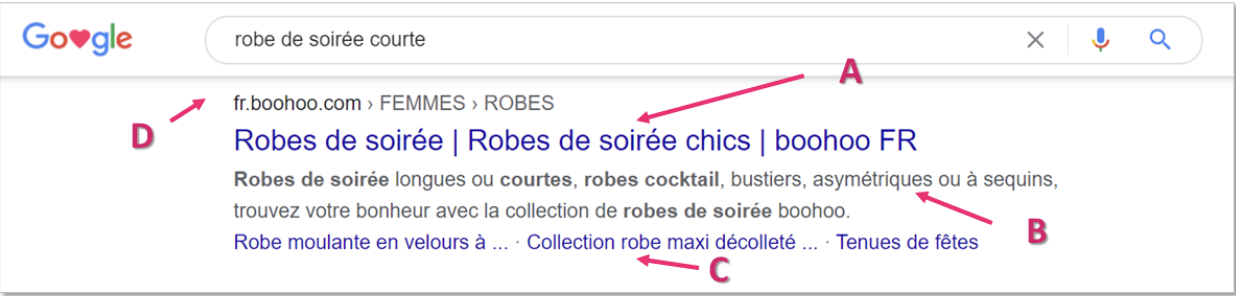
- A - Title tag: the title that will appear in search engines.
- B - Meta description: presentation of the site in a few lines, with the aim of attracting the customer's attention.
- C - Meta keywords: the keywords that you must define so that your site is referenced by search engines. You can define several of them, separated by commas. You can also define expressions, taking care to put them in quotation marks.
- D - Simplified URL: it is automatically completed when you fill in the title tag. This allows you to simplify the category URL.
| 💡 For more information, do not hesitate to consult our article dedicated to SEO! |
How to manage access to a category?
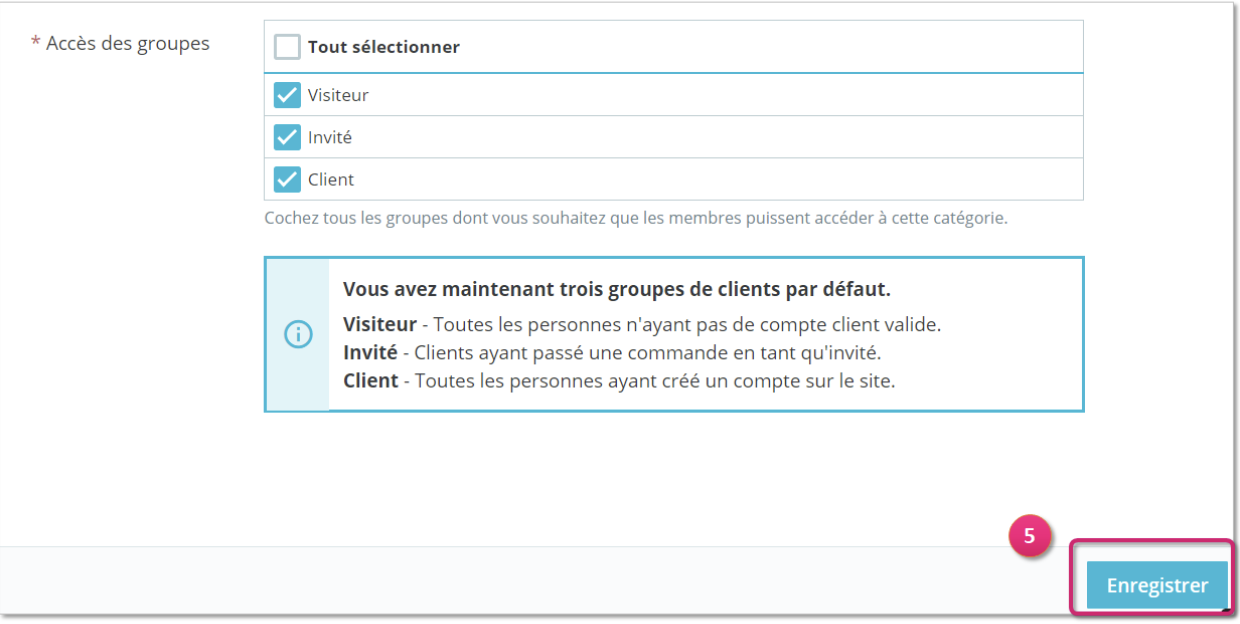
The "Group Access" feature allows you to restrict access to the category and its products to certain groups of customers.
This feature is useful if you want to offer products exclusively to Internet users with a customer account, for example.
To make your category accessible only to a certain category of buyers, select the associated customer group, otherwise click on "Select all" so that everyone can access your category. Save to save your settings (step 5).
How to modify or delete a category?
You can modify or delete categories from the list of available categories, from the Catalogue > Categories page.
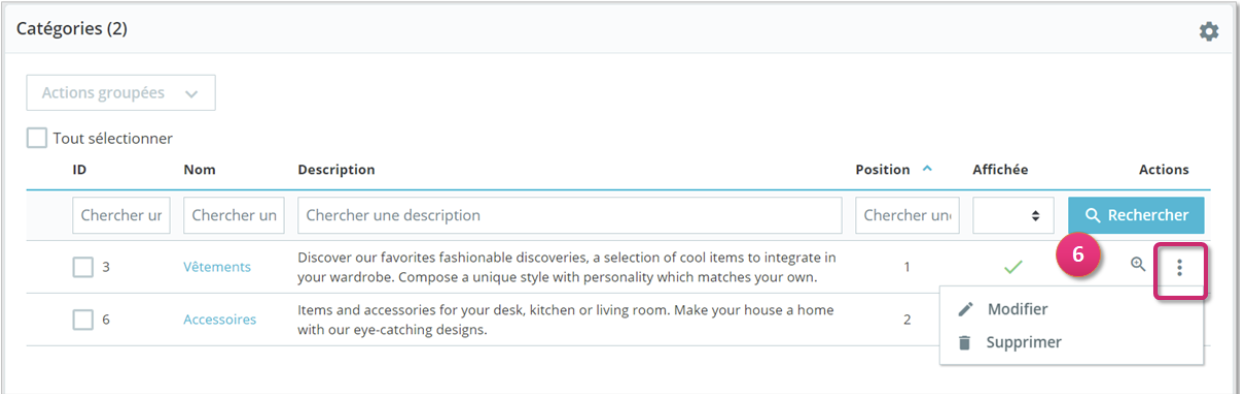
To modify a category, click on the "Modify" button located to the right of the category you wish to modify (step 6).
To modify or delete a child category, click on the name of the main category to display the associated child categories.
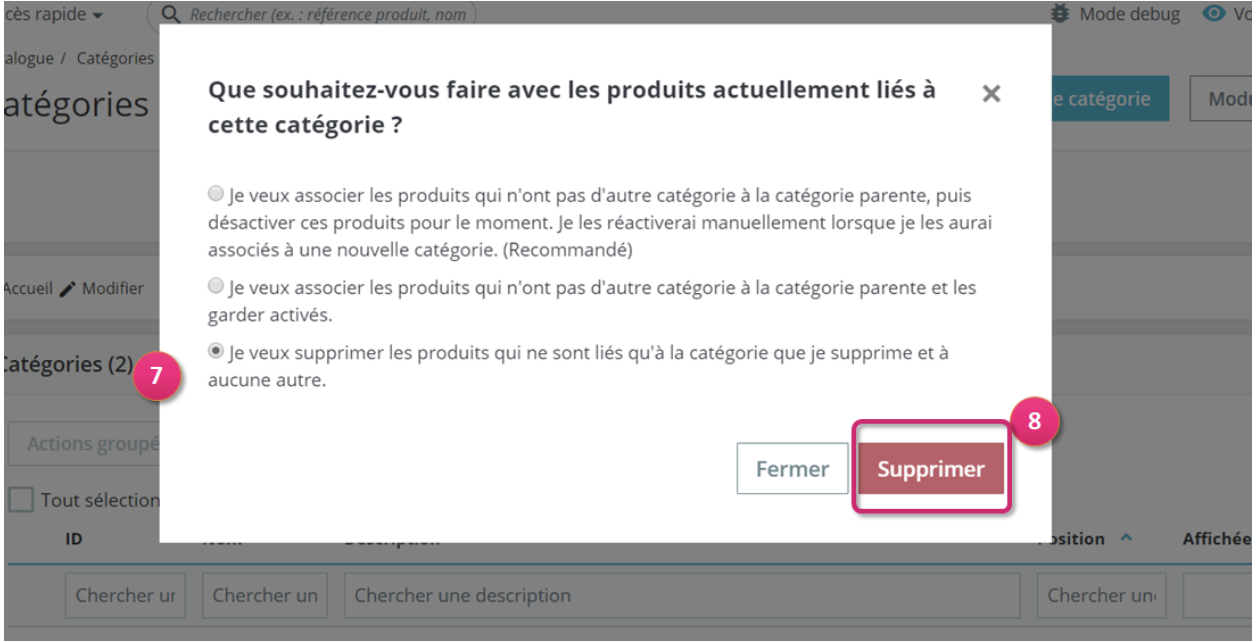
Delete demo categories and products
Your PrestaShop store contains default categories and products, do not forget to delete them so that they are not displayed on your store.
Select the option "I want to delete the products that are only linked to the category I am deleting and to no other" (step 7) then click on “Delete” (step 8).